
Frequently Asked Questions
Click on arrows for information. Click here for new info about using a battery.
Operational Questions
The most asked question is, "What is the accuracy of the timer? "
Quartz Crystals vs. Ceramic Resonator
Our competitors and most Arduino boards use the ceramic resonator for their timing, but all SmartLine timers use the Quartz Crystal Oscillator so that our accuracy is really measured to the ten thousandths (0.0001) instead of the hundredths (0.01). That is 100 times more accurate.
We send a certificate of measurement with each timer.
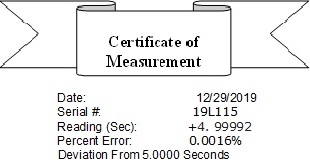
First, you need to understand some terminology.
Crystal Clock accuracy is defined in terms of parts per million(ppm) and it gives a convenient way of comparing accuracies of different crystal specifications.
Frequency stability represents the variation of output frequency of a crystal oscillator due to external conditions like temperature variation. Frequency stability is typically expressed in parts per million (ppm).
Part manufacturers classify the parts with a Frequency Tolerance and Stability that can be in ppm or a percentage.
The table below shows the conversion of the percentage to ppm.
+/-1.000% = +/-10,000 ppm
+/-0.500% = +/-5,000 ppm
+/-0.100% = +/-1,000 ppm
+/-0.010% = +/-100 ppm
+/-0.001% = +/-10 ppm
CERAMIC RESONATOR ERROR
The ceramic resonators percentage of error(%) can be anything from .1% to .5%.
This % translates to 1000 to 5000 ppm (parts per million). That gives through calculations a 0.001 to 0.005 +/-error multiplier.
It indicates how much your resonator's frequency may deviate from the nominal value.
Take the (+/-error multiplier) times the (nominal reading) to get the (+/- range) the time reading can be.
Race of 5.00000 seconds timer results possible
| % | ppm | (+/- error multiplier) | low | nominal | high | worst/typical/best |
|---|---|---|---|---|---|---|
| 0.5% | 5000 | 0.005 | 4.9750 -0.0250 |
5.0000 ERROR |
5.0250 +0.0250 |
worst case |
| 0.2% | 2000 | 0.002 | 4.9900 -0.0100 |
5.0000 ± ERROR |
5.0100 +0.0100 |
typical MicroWizard |
| 0.1% | 1000 | 0.001 | 4.9950 -0.0050 |
5.0000 ERROR |
5.0050 +0.0050 |
best expected |
QUARTZ CRYSTAL ERROR
The Crystal Oscillator percentage of error(%) can be anything from .001% to .005%.
This is 100 times more accurate than the ceramic resonator.
This % translates to 10 to 50 ppm (parts per million).
That calculates to 0.00001 to 0.00005 +/-error multiplier.
It indicates how much your crystal's frequency may deviate from the nominal value.
Take the (+/-error multiplier) times the (nominal reading) to get the (+/- range) the time reading can be.
Race of 5.00000 seconds timer results possible
| % | ppm | (+/- error multiplier) | low | nominal | high | worst/typical/best |
|---|---|---|---|---|---|---|
| 0.005% | 50 | 0.00005 | 4.9998 -0.0002 |
5.0000 ERROR |
5.0003 +0.0003 |
worst case |
| 0.002% | 20 | 0.00002 | 4.9999 -0.0001 |
5.0000 ± ERROR |
5.0001 +0.0001 |
typical SmartLine |
| 0.001% | 10 | 0.00001 | 5.0000 -0.0000 |
5.0000 ERROR |
5.0001 +0.0001 |
best expected |
What is a Quartz Crystal Oscillator?
A crystal oscillator is an electronic oscillator circuit that uses the mechanical resonance of a vibrating crystal of piezoelectric
material to create an electrical signal with a precise frequency.
Quartz Crystals are able to “oscillate” within the desired frequency with little power required to keep it activated.
Crystals can be specified with a precise frequency stability and as the surrounding heat increases
the crystal oscillator is able to keep the frequency stability with minimal frequency change with a 10 PPM (parts Per Million or 0.001%)
over -20 ~ +70°C. The tight stability makes crystal suitable for ZigBee/Bluetooth and other wireless applications.
Crystal oscillators can be found in everything from televisions to children’s toys that have electrical components. They are
used in devices such as watches and clocks that require a more accurate reading.
Also, crystal oscillators utilize a hermetically sealed package so they would always be recommended over the ceramic resonators
which are environmentally sealed. The crystal is recommended for wide temperature range or harsh environments.
The conclusion is that quartz crystal oscillators are more accurate and temperature stable than ceramic resonators.
What is a Ceramic Resonator?
A Ceramic Resonator works similar to a crystal. The ceramic resonator utilizes a frequency within the electrical component but unlike the crystal which has a frequency tolerance of 10~30 PPM , a ceramic resonator carries a 0.5% or 5,000 PPM frequency tolerance which is generally used in less stringent microprocessor applications where absolute stability is not important.
In conclusion...
Quartz crystal oscillators and ceramic resonators activate and work similarly as they both vibrate mechanically when an AC signal is applied to each respectively. This is what generates the timing like the ticking of a clock. However, there is a big difference in the accuracy of a clock that uses a ceramic resonator rather than a crystal oscillator. Do you ever hear of a Rolex watch advertising the accuracy of their ceramic resonator clock? I think they may use a Quartz Crystal and for good reason. If you had a watch that you rely on to give you an accurate time of day it will surely use a quartz crystal to do that. Hence there are about 1 million minutes in 2 years. If your clock was stable to 1 ppm, it might drift 1 minute in 2 years. If your clock was off by 20 ppm, the error would be 20 minutes after 2 years. If you are using a ceramic resonator that drift would be multiplied by 100 times, the error would be 33.3 hours in 2 years.
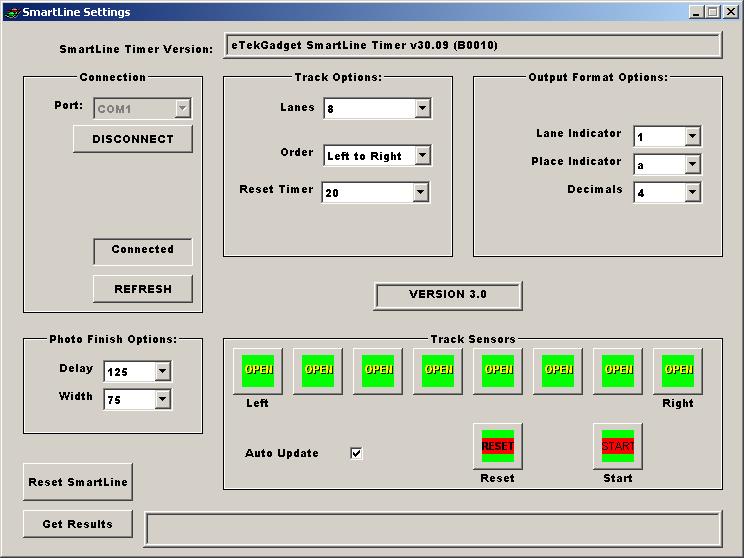
The timer is not communicating with the computer software?
-
Check to see if you have the USB driver installed
First check to see if you have a driver installed for the Serial to USB converter or the SmartLine II USB timer.
You can find out if the correct driver is installed in the Windows Device Manager.
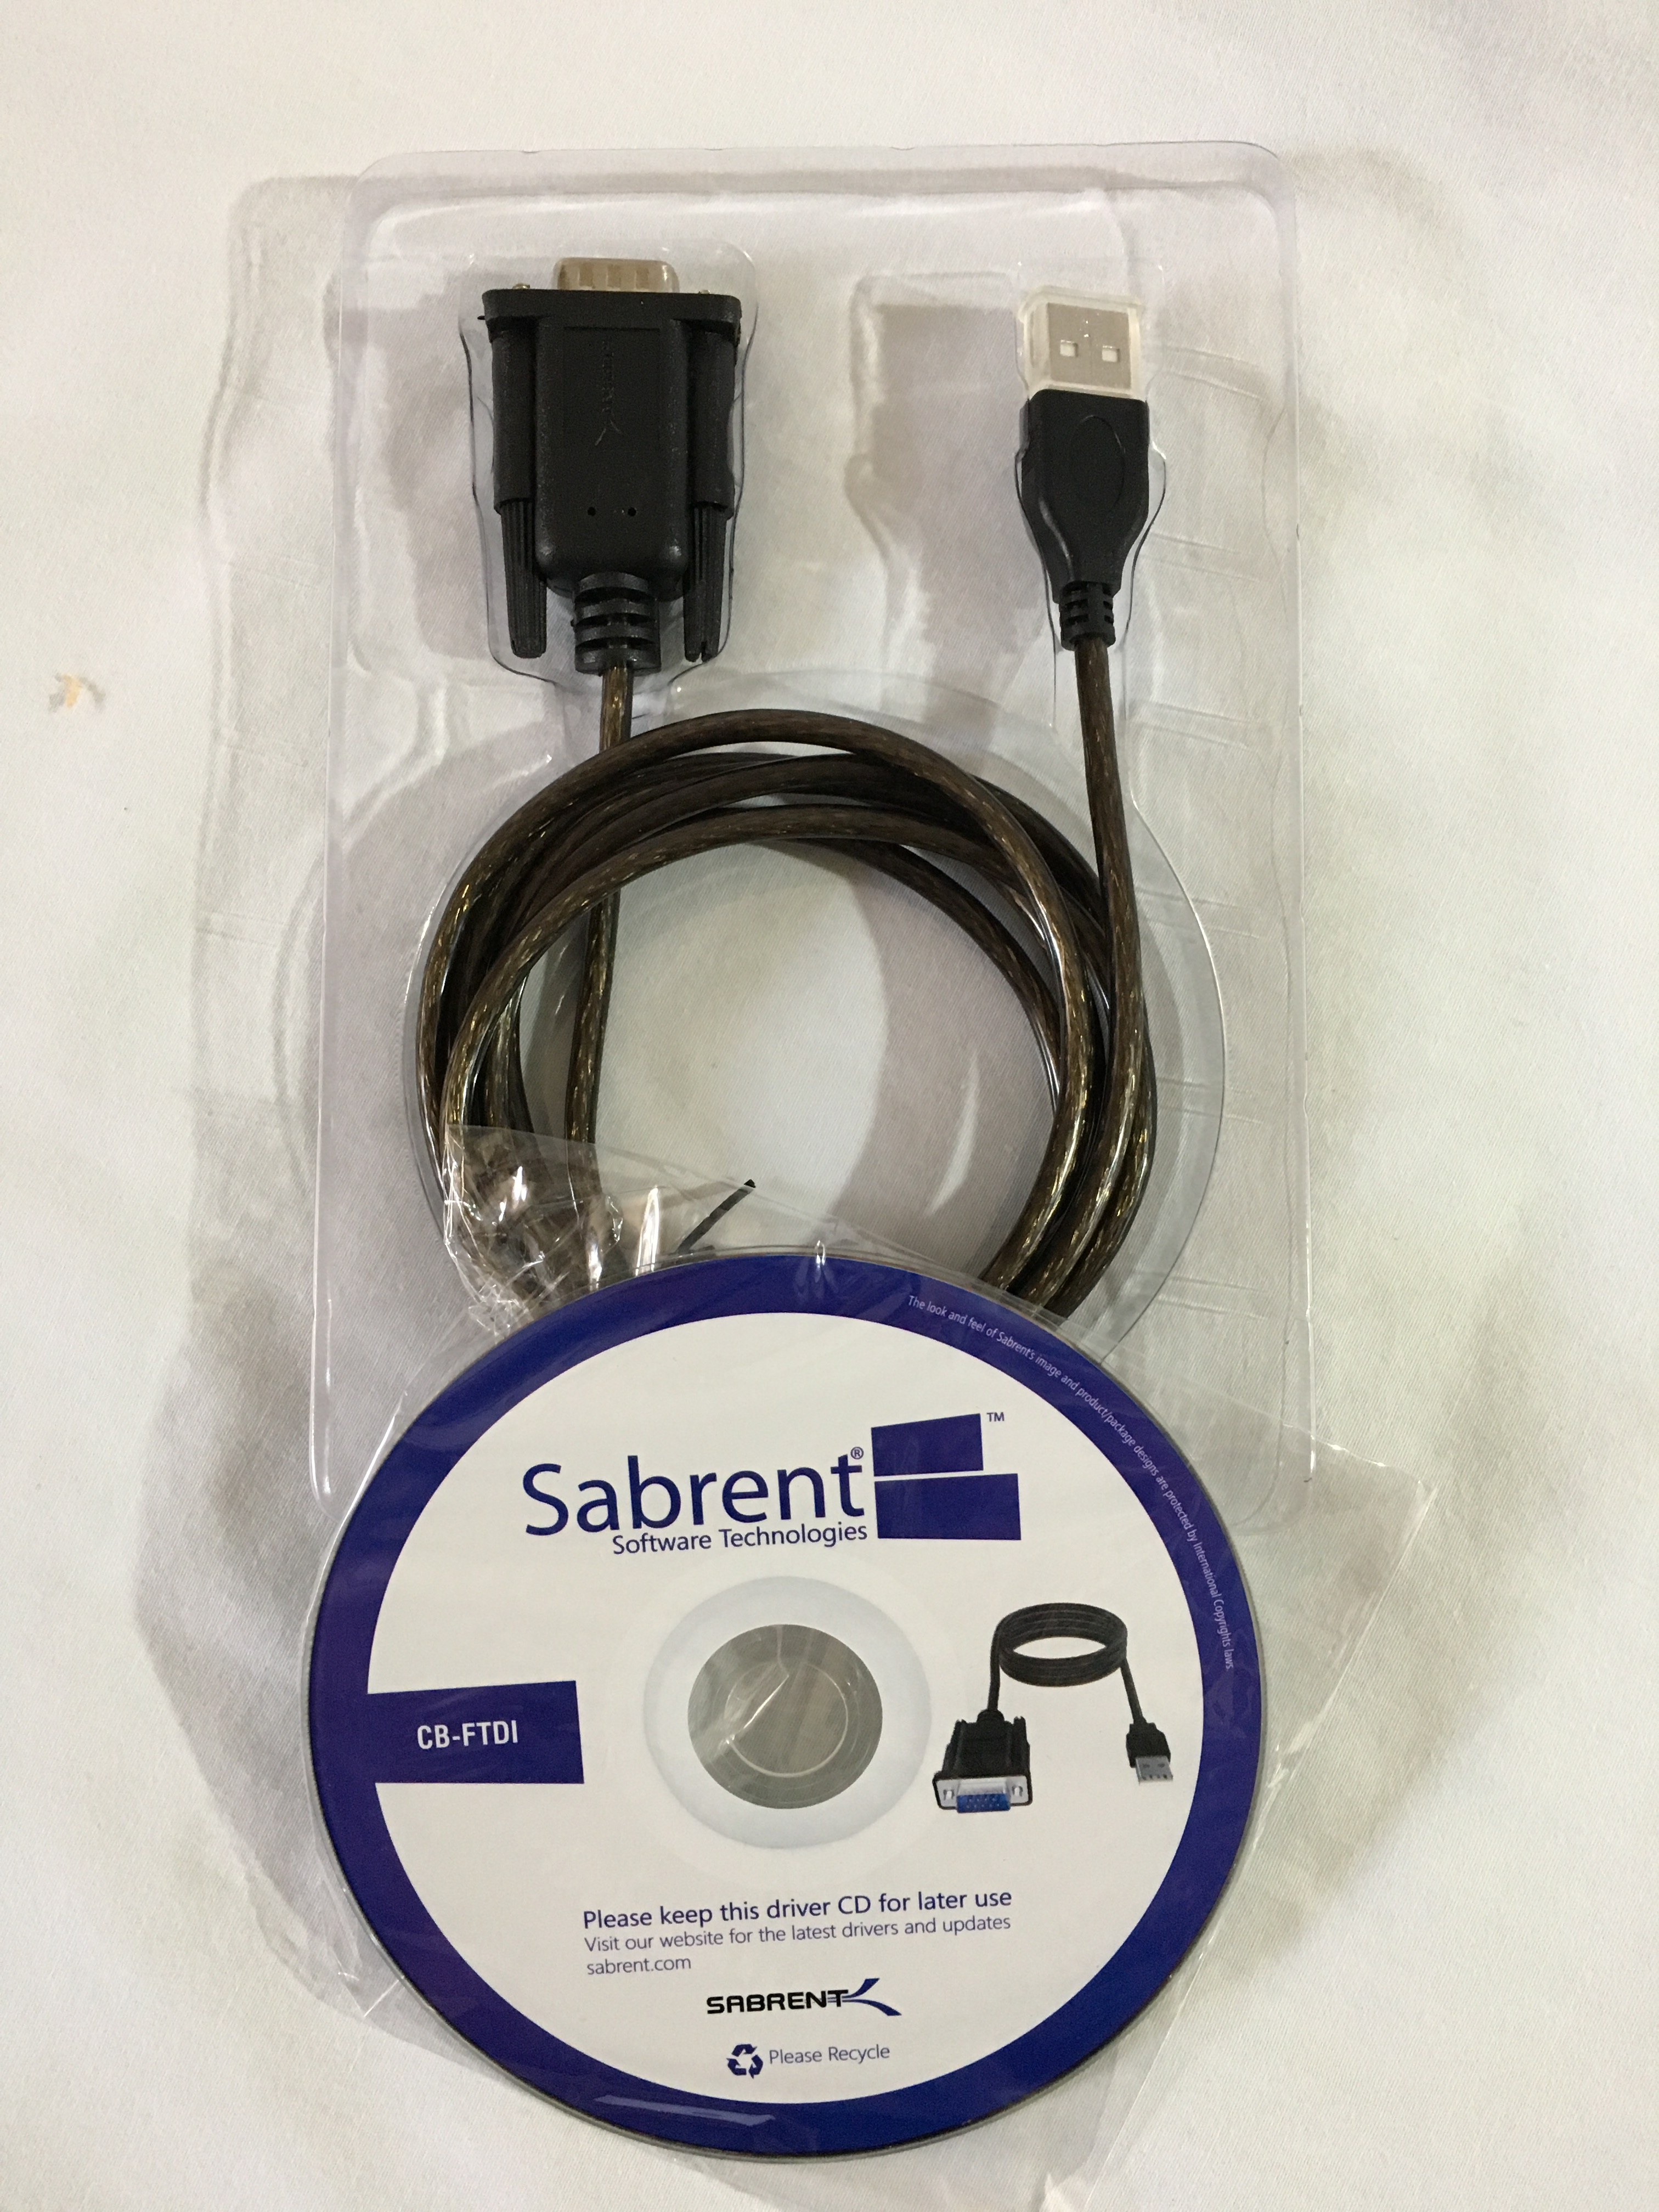
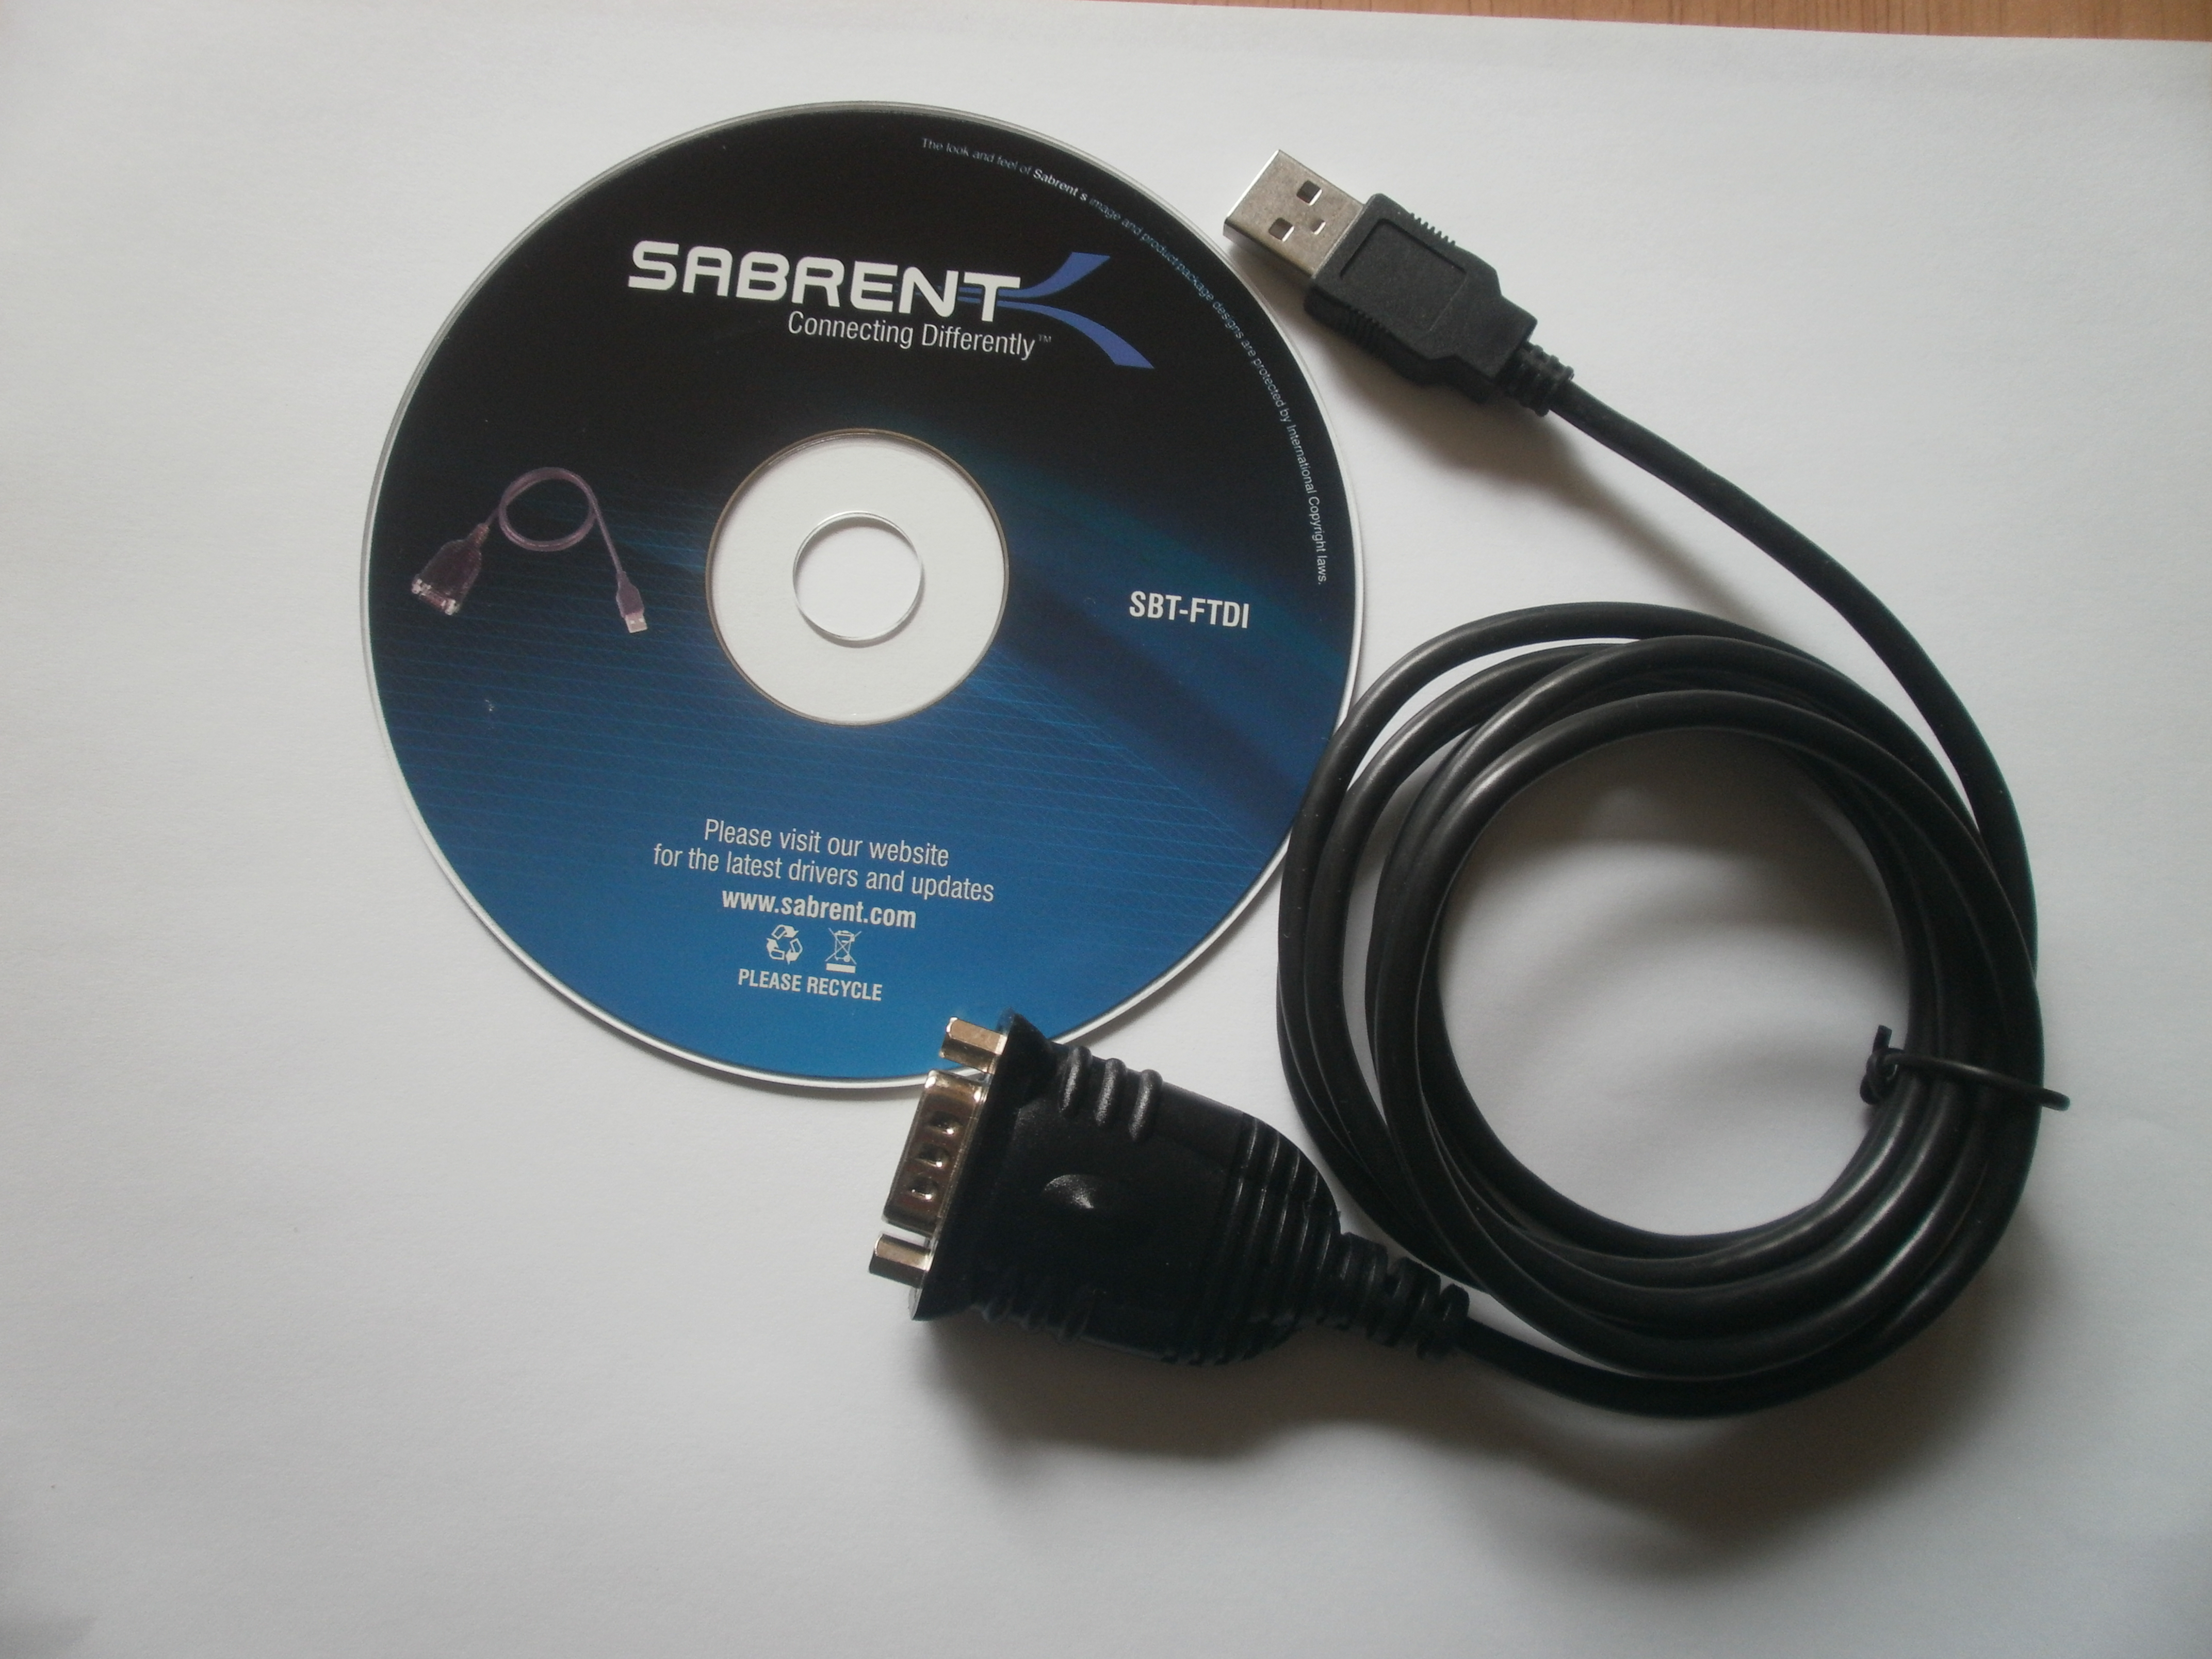
If you need a driver, follow the link to our manuals page for the drivers and more information.The current USB to Serial converters that we sell is the CB-FTDI. The USB to Serial converter we sold until Spring 2019 is the SBT-FTDI. The only difference between the two is the type of connector on the serial side.
We have sold MicroInnovations and Alcor in the distant past. If you have one of our timers and converter devices from before 2009 you may have one of these. We supply those drivers for older Windows platforms (WinXP and older). You can look on the web for newer drivers but it may be worthwhile to purchase a newer converter. These converters contain the Prolific chipset. -
Check the communication protocol mode.
Do you see "SL" or "dd" on the timer displays when you power it on?
If you see "SL" on the displays, the timer is in the native SmartLine mode and you probably need a driver as described above.
If you see "dd", the timer is in DTX mode. If this is the case and you are not using an old version of race management software, you need to reset the timer into the SmartLine mode. You can reset the timer into SmartLine communication mode by pressing the reset button down while you plug in the power. You will see the "SL" on the displays.
Contact us if you have any questions. -
Check that only one program is connected to the timer.
Do you have a race manager program running at the same time as the LineSetup4?
They can not both be running at the same time. You can not just minimize one and use the other.
How do you set up the serial to USB converter?
There is a CD with the USB to serial converter that we sell. If you have lost the CD, you can find the driver on the manufacturers website.
In our case, it will be FTDICHIP.COM
FTDI Website contains drivers for all platforms for converter currently sold. Select appropriate VCP driver from the list on the FTDI website.
Most manufacturers advise installing the driver from the CD or their website before plugging the cable into the computer.
If you don't have the CD or need documentation for installation, follow this link to the
manuals page to find information on drivers for USB to serial converters
that we've sold.
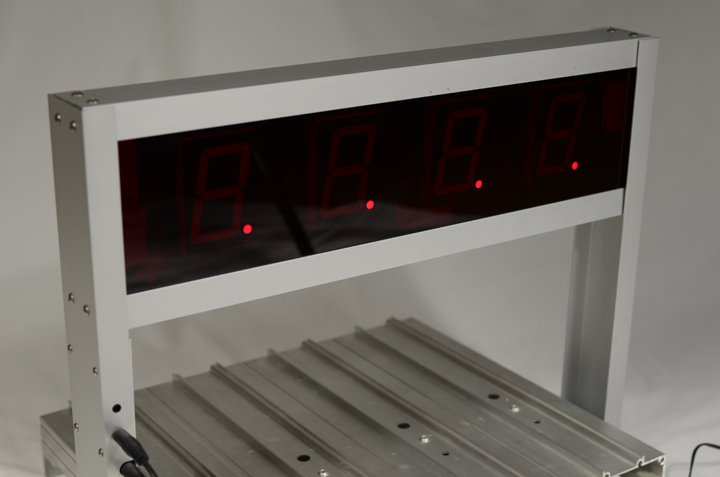
The timer shows a dot on the display. What does that mean?
The start gate is open when the timer resets. The dots will disappear when the start gate is closed and the timer is ready for next race. If the dots do go out and the start gate is closed then the start switch is not mounted properly under the track. You may use LineSetup4 to see if the switches are working. You may test the connection from the end of the cable to the timer. Watch the video on testing the start gate connection using a paper clip.
The timer shows a lower case c on the display. What does that mean?
There is an object breaking the sensor beam and the timer can not reset. Here are some suggestions to check:
You can test the sensors by shining an incandecent light (old style flashlight or desk lamp) into the sensor.
The c should go out.
The sensors are very sensitive and even a piece of dust could cause this.
You can blow it out with air or use a Q-tip with some water to clean it.
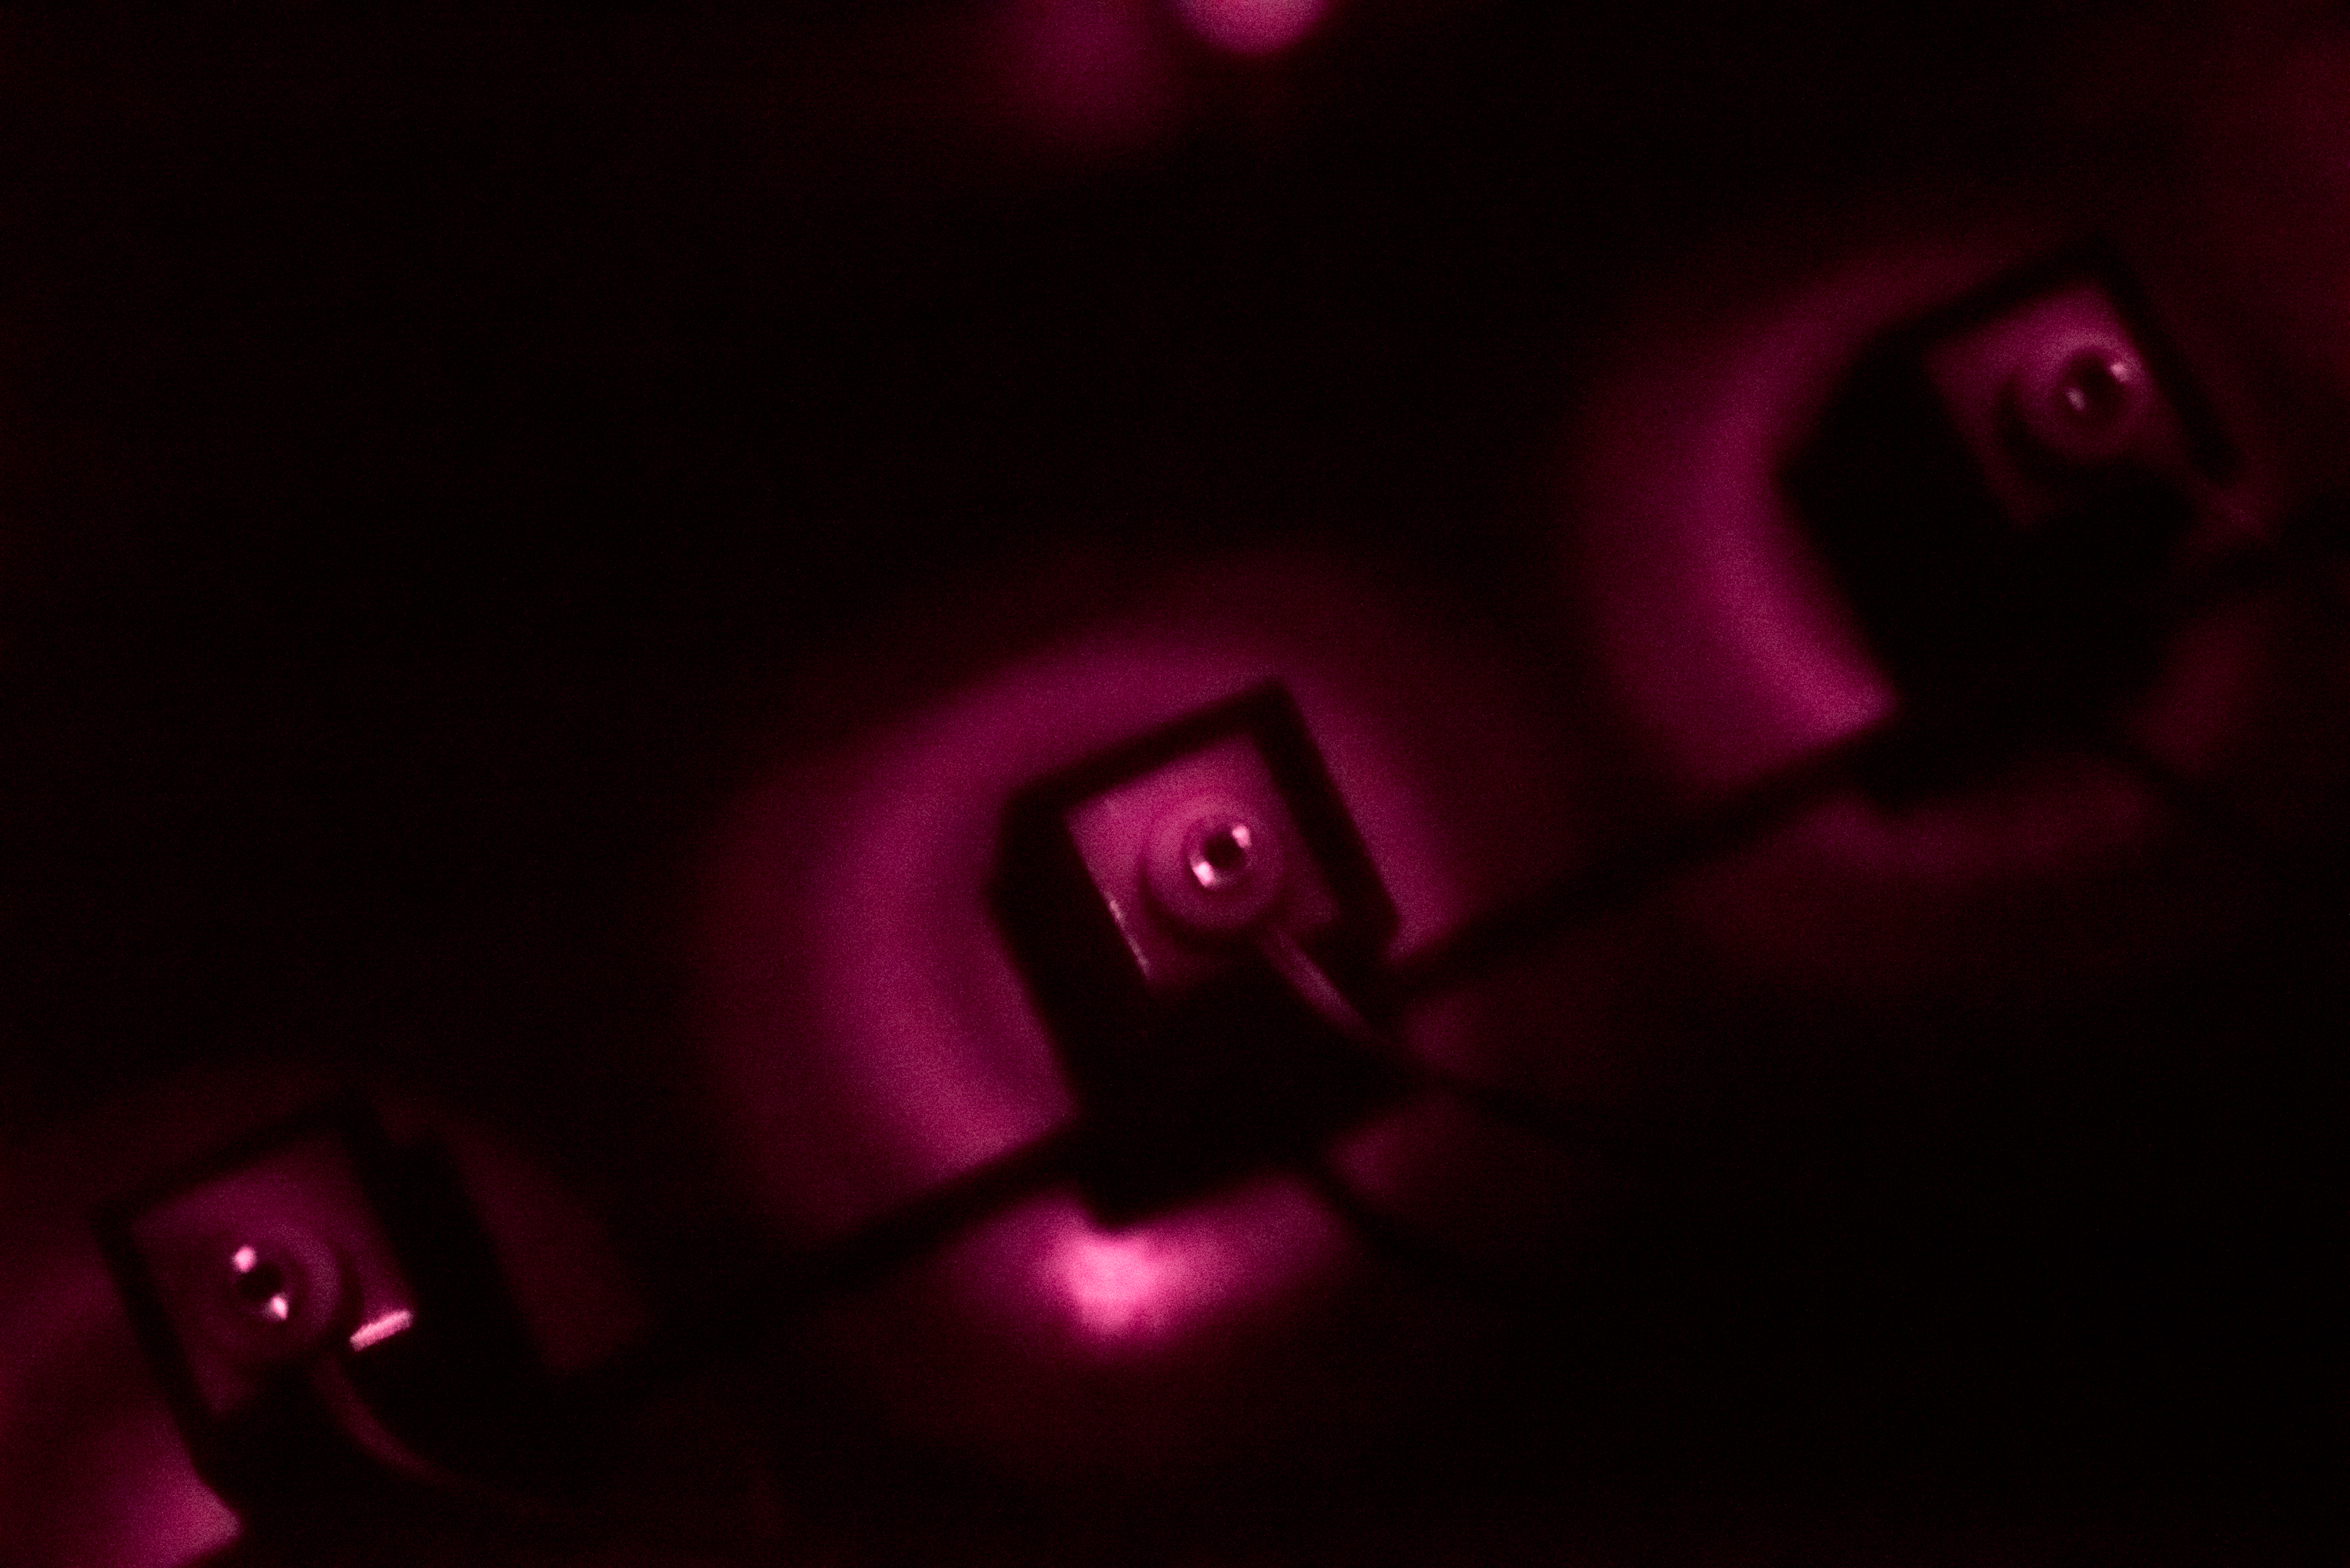
Make sure that the LED is pointed straight down toward the sensor.
The LED can not be seen by eye but it shines like a flashlight.
There may be a dim ring in the beam and a small adjustment may be needed.
It is possible to see the
LEDs beams
with some digital cameras if the room is dark enough.
The power supply must also be over 800mA for a 6 or 8 lane timer.
Finally, check that the wires have not been pinched under the track causing this problem.
The time shown in the GrandPrix software is 0.0001. What does that mean?
The start switch is not installed properly or is not working. The timer shows the time of 0.0000 for the first car to cross the finish line when the start switch does not start the timing. The GrandPrix Race Manager program changes race time value from 0.0000 to 0.0001 because it uses 0 as a 'did not finish' indicator.
Do I need the start switch?
You need the start switch if you are using race management software.
The race management software uses time for scoring in most cases although you can set it to use a point system.
The start switch starts the timer timing when the gate opens.
You can run the race without a start switch, but the times will not be useful.
The timer starts timing as the first car crosses the finish and it will show 0.000.
If you are using a race management program and your start switch is not working you can use the point system.
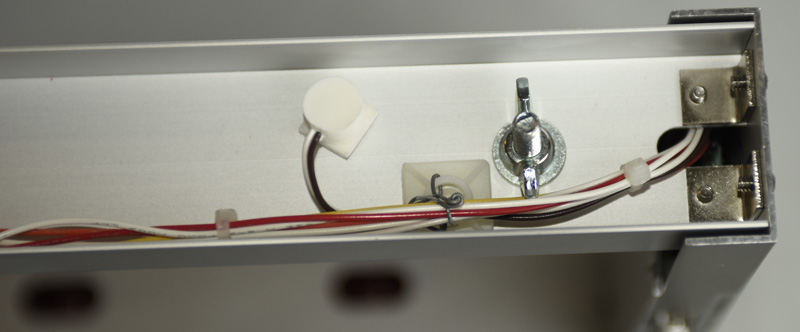
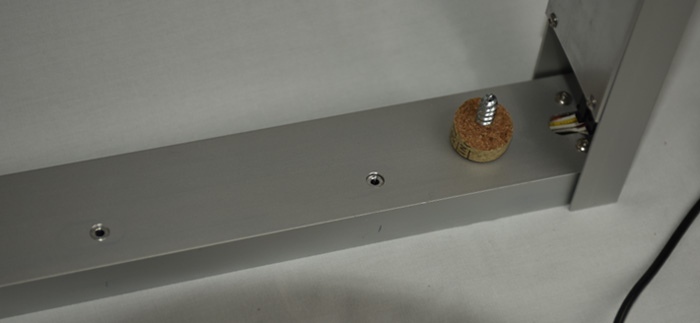
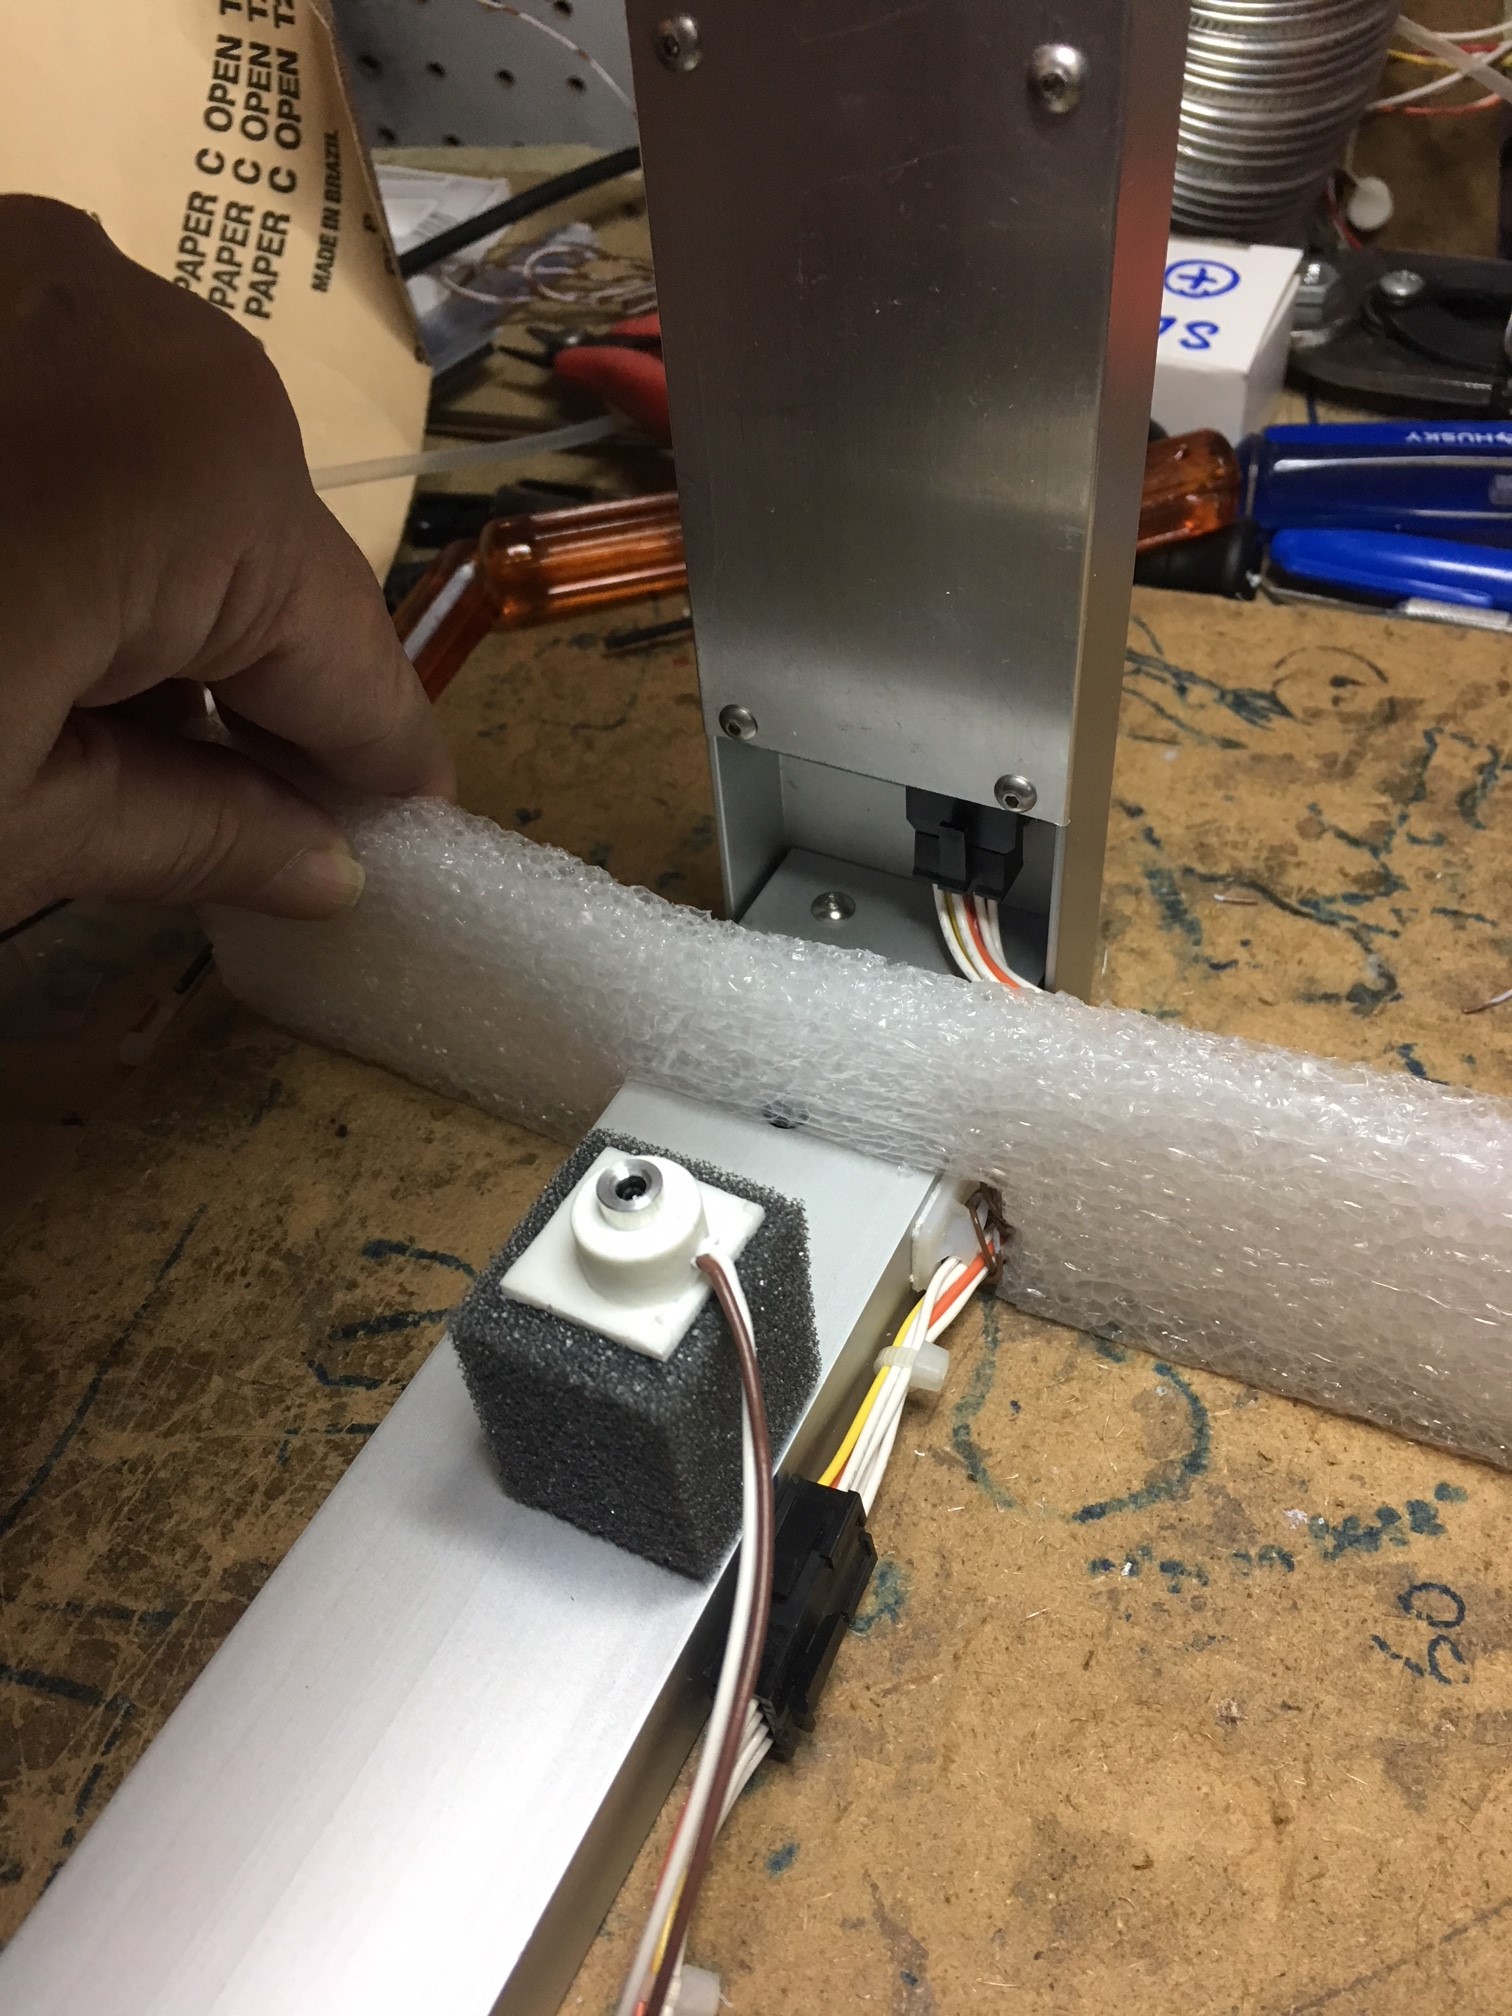
How do I mount the start switch?
The mounting of the start switch is normally under the start gate. When the gate opens the lever releases the button.
We send the switch wired so that it is Normally Closed.
We send the switch mounted on a bracket that can be screwed onto the BestTrack® track with a nut and bolt.
We send the bracket along with timers for other tracks but you may need to use wood screws to mount the switch.
Piantedosi tracks require the switch to be mounted on a fixture under the track.
Is your sensor affected by sunlight or camera flashes?
Our timer is not affected by camera flashes since they do not contain infrared light. The sensors are affected by direct sunlight. We did not see any problems when it was cloudy or hazy. The sunlight on a clear day did interfere with the sensors. The lower angle of the sunlight is a problem because it can shine under the car. This is more evident if the car is higher up off the track. It is also more of a problem if the sensors are flush with the track rather than recessed down into the track. We suggest that you shade the timer by building a little carport with some scraps of wood or use a tent. The strength and angle of the sunlight along with the depth of the sensor in the track determine when the sensor will trigger. The height of the car was also a factor in when the sensor triggered. When the sun is shining under the nose of the car it will trigger later. When we tested this on our metal track where the sensors are flush with the track, the crayon car did not trigger until just in front of the wheels. The sensors are recessed into our test track by 5/16". This helped but the car still triggered a fraction of an inch later than when the timer was shaded. If you put a covering over your timer or have a nice cloudy day, your timer will work just fine.
An additional feature is that it will work with a battery. There is an explanation of how use a battery below. Contact us if you are interested in more information.
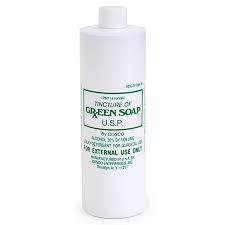
Can you explain the solution of "GREEN SOAP" and "GLYCERIN" used to lube the rubber bands for the space cars?
You need a mixture of two parts "GREEN SOAP", one part "GLYCERIN" and one part water for lubricating the rubber bands.
I was told that tincture green soap and glycerin can be found at your nearest Wal-Mart, if not on the shelf, ask for it. They can usually get it within 24 hrs if ordered early in the day.
"GREEN SOAP" is a soft soap made from vegetable oils with sodium or potassium hydroxide in concentrations adjusted to retain glycerol.
You can find the green soap and glycerin at a pharmacy, Walmart, Michaels, or online at Amazon. Click on the image links above to see images of them.
Why won't my photo finish capture device work?
We have updated our photo finish to work with Windows 7 or newer operating systems.
Our photo finish capture device is the Diamond One Touch.
We have not been able to verify it on a Windows 10 computer, however, one of our customers has. Please
read the excerpt from his letter below.
Here is an excerpt from one of our awesome customers:
"Hi Nancy,
Sorry for bringing up an old email. But I was able to get the photo finish working in windows 10.
I work in Cybersecurity and was able to use my forensic tools to figure this out.
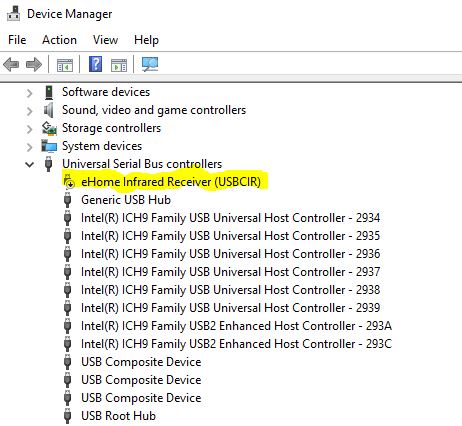
All you have to do is before you install the driver, disable the "eHome Infrared Receiver (USBCIR)"
under "Universal Serial Bus Controllers" in device manager. If this is disabled, the driver installs
correctly and the application works great. The eHome driver conflicts with the vt500 driver.
So great to have this working on a brand new windows 10 laptop :).
I tested this on a few other windows 10 systems and all of them work.
See attached photo.
Thanks, Ed"
and THANK YOU Ed!
We have had it partially working on Windows 10 but the "Live" screen was black even though the captured picture was good.
This may be due to the video graphics hardware on some laptops. It may work differently depending on the brand of laptop.
Since we were able to see the captured picture, we could use the capture button on the device to take pictures while lining
up the camera and then delete those pictures when we were ready to use the device.
You will need to disable any additional camera devices you have running on your Windows 10 computer.
If you have a Hauppauge capture device, you must use a Windows operating system older than Vista.
Please contact us on SmartLine's Facebook
or through email if you have more questions.
What power supply do I use?
The power adapter we supply with our timer is a 12V 1Amp center positive. The minimum for the 4 lane or less is 12V 500mA center positive and 800mA for a 6 or 8 lane timer.
Battery 
Battery instead of a power supply. Click here for some options.
We have a couple ways for you to use a battery if you have no access to an outlet.
There are a wide range of batteries available from about $8 to $40.
Best Option - 12V SLA(Sealed Lead Acid) rechargeable battery
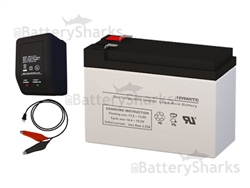
Option 1: (Best Option)One of the most economical we found is the 12V SLA(Sealed Lead Acid) rechargeable battery.
Battery Sharks is a reputable supplier of replacement batteries. However, whenever you are shopping you need to check prices.
They currently have a special on a 12V-9AH-F2 SLA rechargeable battery with a 12V-1A charger for $30. Click here for an image of 12V-9AH-F2 SLA battery with a 12V-1A charger. I found the price of the battery alone is on sale for $13.77 and the 12V-1A charger for this battery alone is on sale for $11.88. This would be a good battery for extended lengths of time.
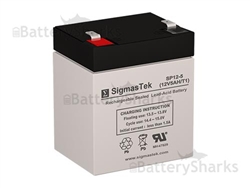
Another good option is the 12V-5AH-F1 SLA rechargeable battery. It is on sale for $8.33. You can use either the 12V-1A or a smaller 12V-.5A charger.
Home Depot carries an 12V 5Ah SLA battery for around $16 and 7Ah for $17.5. They carry a 12V charger for around $12.
The price will vary depending on the amp hours it supplies and where you buy it.
Option 2:
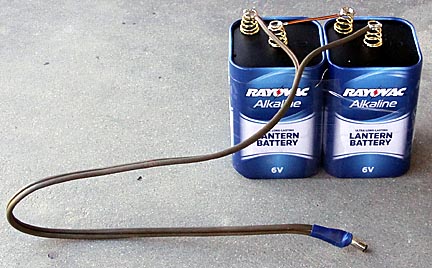
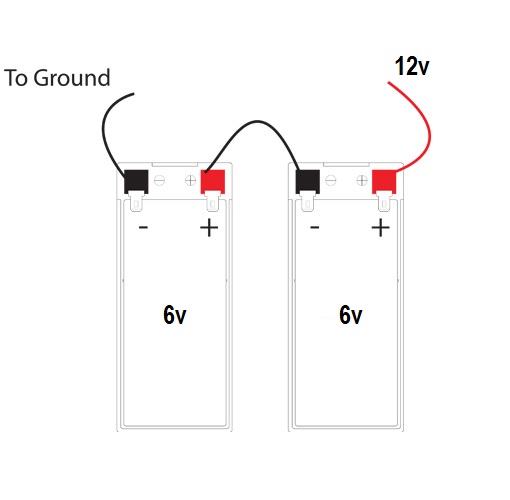
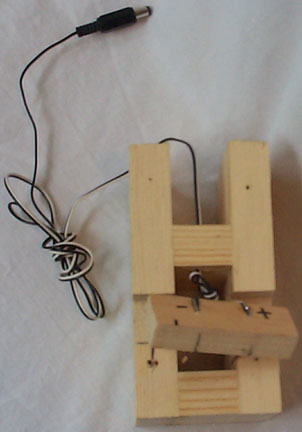
Two 6-volt batteries connected in series provide the needed 12 volts for over 4 hours of use. Cut off the power plug from a power converter/adapter that you don't need. Wire it to the batteries in series as shown in the schematic. Use an ohm meter to determine which wire is the center of the plug and wire that to the positive(+). Black wire ground on Sleeve(outer) part of plug. Red wire + on tip (center) of plug. If you use the plug from Monoprice the wires are Red and Black. If you use the plug from Mouser the cable is marked differently. In that case use the specs to determine the center positive wire. Picture of 2 6V batteries in series.Option 3:
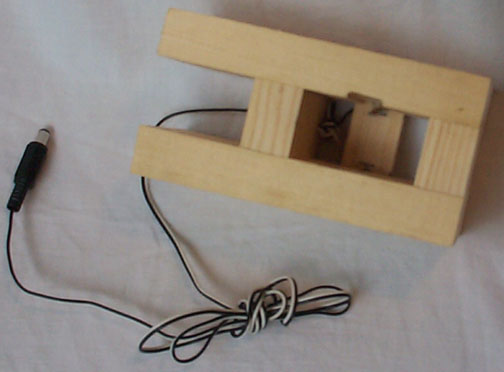
Use a drill battery that produces the 12 volts you need to run the timer. It's a good idea to have a backup available. They may not last long enough for your event. Make the holder for the battery with the wire and a power plug wired into a removable block of wood.Don't destroy the power adapter you get with the timer!
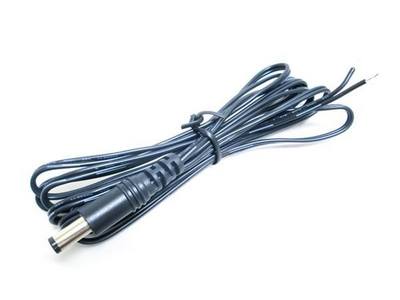
Use an old adapter that you don't use or purchase a plug and better yet a plug with the wire already attached from a supplier such as Mouser electronics or Monoprice.
The power plug dimensions need to be OD: 5.5mm and the ID: 2.1mm. The barrel length should be 1.1cm.
An example of the part you need with the power cord already attached is Mouser #: 172-7443-B-E. It's best to use this plug and cord combination because there is less confusion with the color coding. The 2 wires on this cord are denoted by a solid Black wire and Black with white stripes to indicate the center positive wire. There is another part with Red and White wires but the White is the tip/center positive(+) but on the battery there is a red indication for the positive(+) terminal. This could be confusing. It is extremely important to wire it correctly.
The monoprice plug and jack use red and black wires. The black wire is the negative. It is wired to the outside or barrel of the plug.
Important! Polarity must be correct.
Be sure to get the polarity correct in all cases!If you are using a plug that is already wired but don't know which wire is the center +, use an ohm meter to determine which wire is on the center or tip of the plug. This needs to be on the positive(+) terminal.
If you are wiring your own plug, mark the center or tip wire so you know which one is positive after you put it back together.
Links for you.
Visit the Mouser website for details about this part.Here are links to the monoprice website for a power plug and jack. We suggest that you can use the jack on the charger.
Monoprice dc PLUG on short wire:: Monopirce
Monoprice dc JACK on short wire:: Monopirce
Visit the Battery Sharks website for lots of information.
Ordering Considerations
I want to make sure I get everything I need. What else do I need to order besides the timer?
All essentials are included, but here are some items you might want:
Most people order race management software to run the races. Our timer works with GrandPrix Race Manager and DerbyMaster.
View the Helpful Links page for information about race management software.
You will need a USB to serial converter if you are purchasing a SmartLine Timer II with a Serial output
and you don't already have a converter. We offer the USB converter as seperate items because some people
may have them already.
A case is a great way to keep the timer safe and secure for many years of use.
One of the most common problems is that the CDs are missing. It may help to have a case to keep everything together.
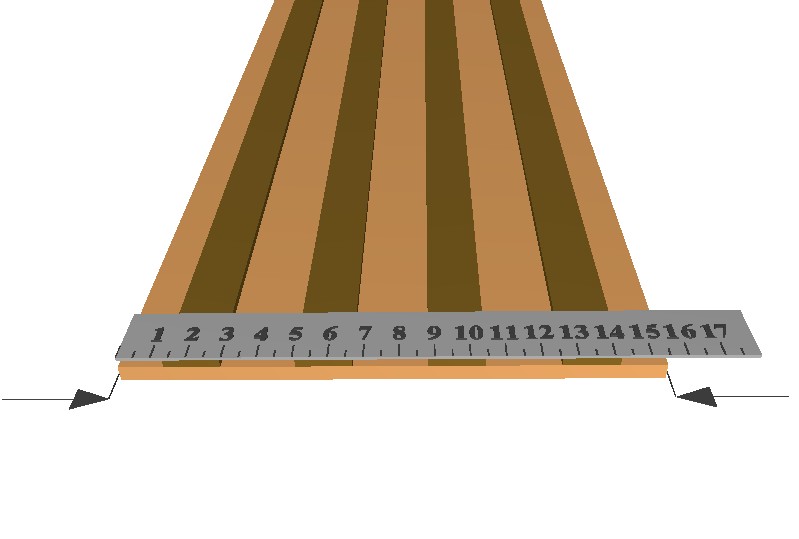
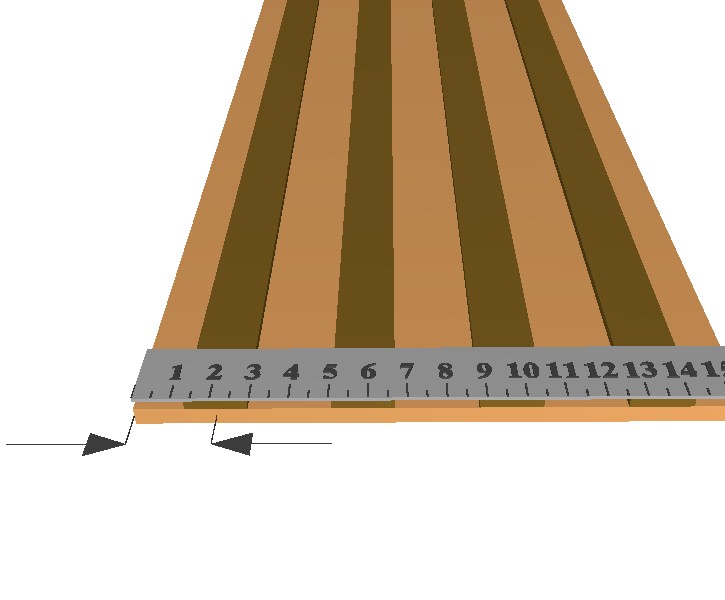
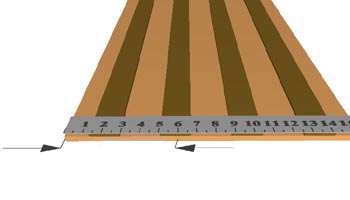
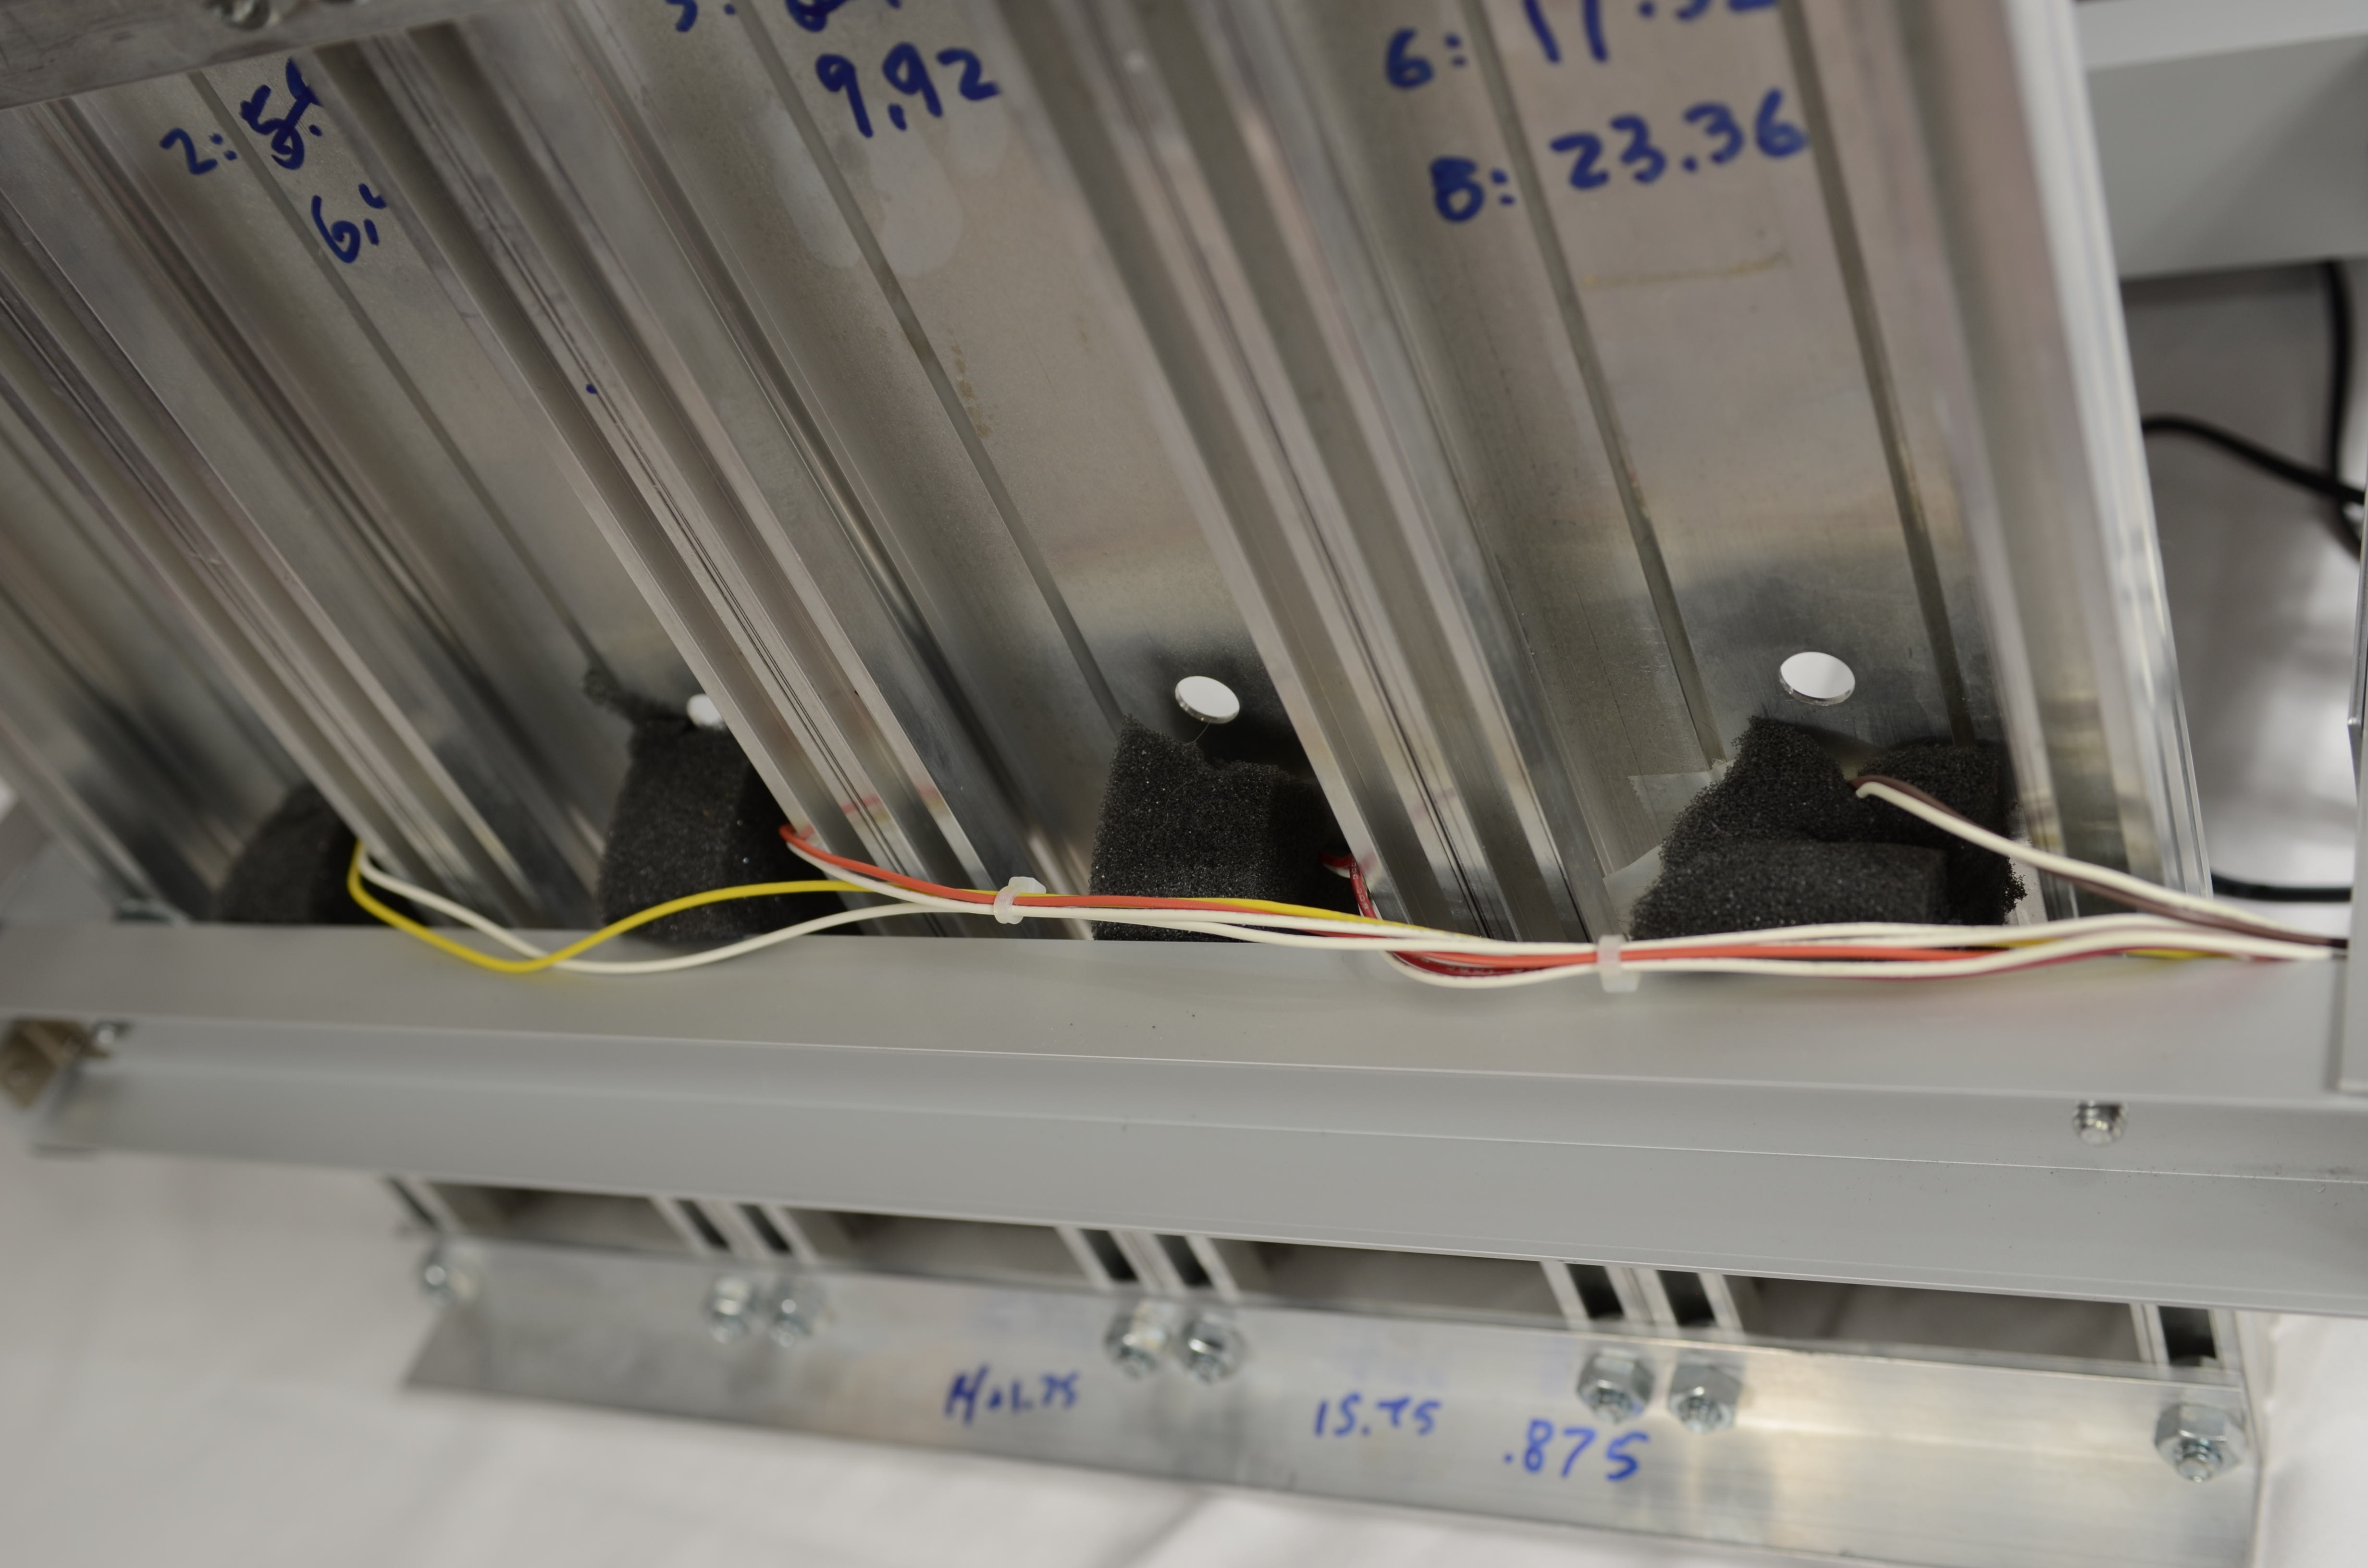
What information do I need when I order a timer? Do I need measurements of the track?
We need the BRAND OR TYPE of track.
If it is a custom wood or Piantedosi Classic wooden track, we will need the dimensions of the track.
Email a picture of your track if you are having trouble identifying it.
We must have to total width of the track. We cut the timers to fit each track.
We must have the measurements to the center of each lane. The measurements must be taken from the left side of
the track looking from the starting line toward the finish line. Send us the measurement from the left edge of
the track to the center of each lane separately.
For example, Lane 1=2.75",Lane 2=6.25",etc. The pitch between lane 1 and 2 is 3.5".
We use this to place the sensors and displays.
Measurement Example - Measurement from start looking toward finish
We also need to know your Race Date so we can make sure you have your timer with time to set it up beforehand.
It is important to work with the timer ahead of time so you are familiar it. This is especially true if you are using a
race management program.
What software does your timer work with?
We have verified our timer with the following major race management software packages:
GrandPrix and DerbyMaster Race Management Software has integrated the native command set and
uses the full functionality of the timer.
The race management software overview describes
and provides links to these packages so that you may choose the package that you like the best.
They provide free demos.
The GrandPrix takes full advantage of our extensive commands.
They implement the masking of lanes and allow you to change the photo finish delay settings from within their program.
DerbyMaster is no longer sold.
Does the SmartLine timer display elapsed times or must I connect it to a laptop and purchase software?
You can use the SmartLine Timer with or without a computer.
We offer a single or double sided version that displays the elapsed time as well as placement so you can manually record results.
Our timer will also send the elapsed times for each car to a computer for use with any software package.
The race management packages are convenient, but not necessary.
We provide all the commands for you to write your own package.
You may also use our
LineSetup4 Utility Program or a terminal program, such as HyperTerminal, to read the results
and record them manually. This is not recommended but is an alternative method of using the timer.
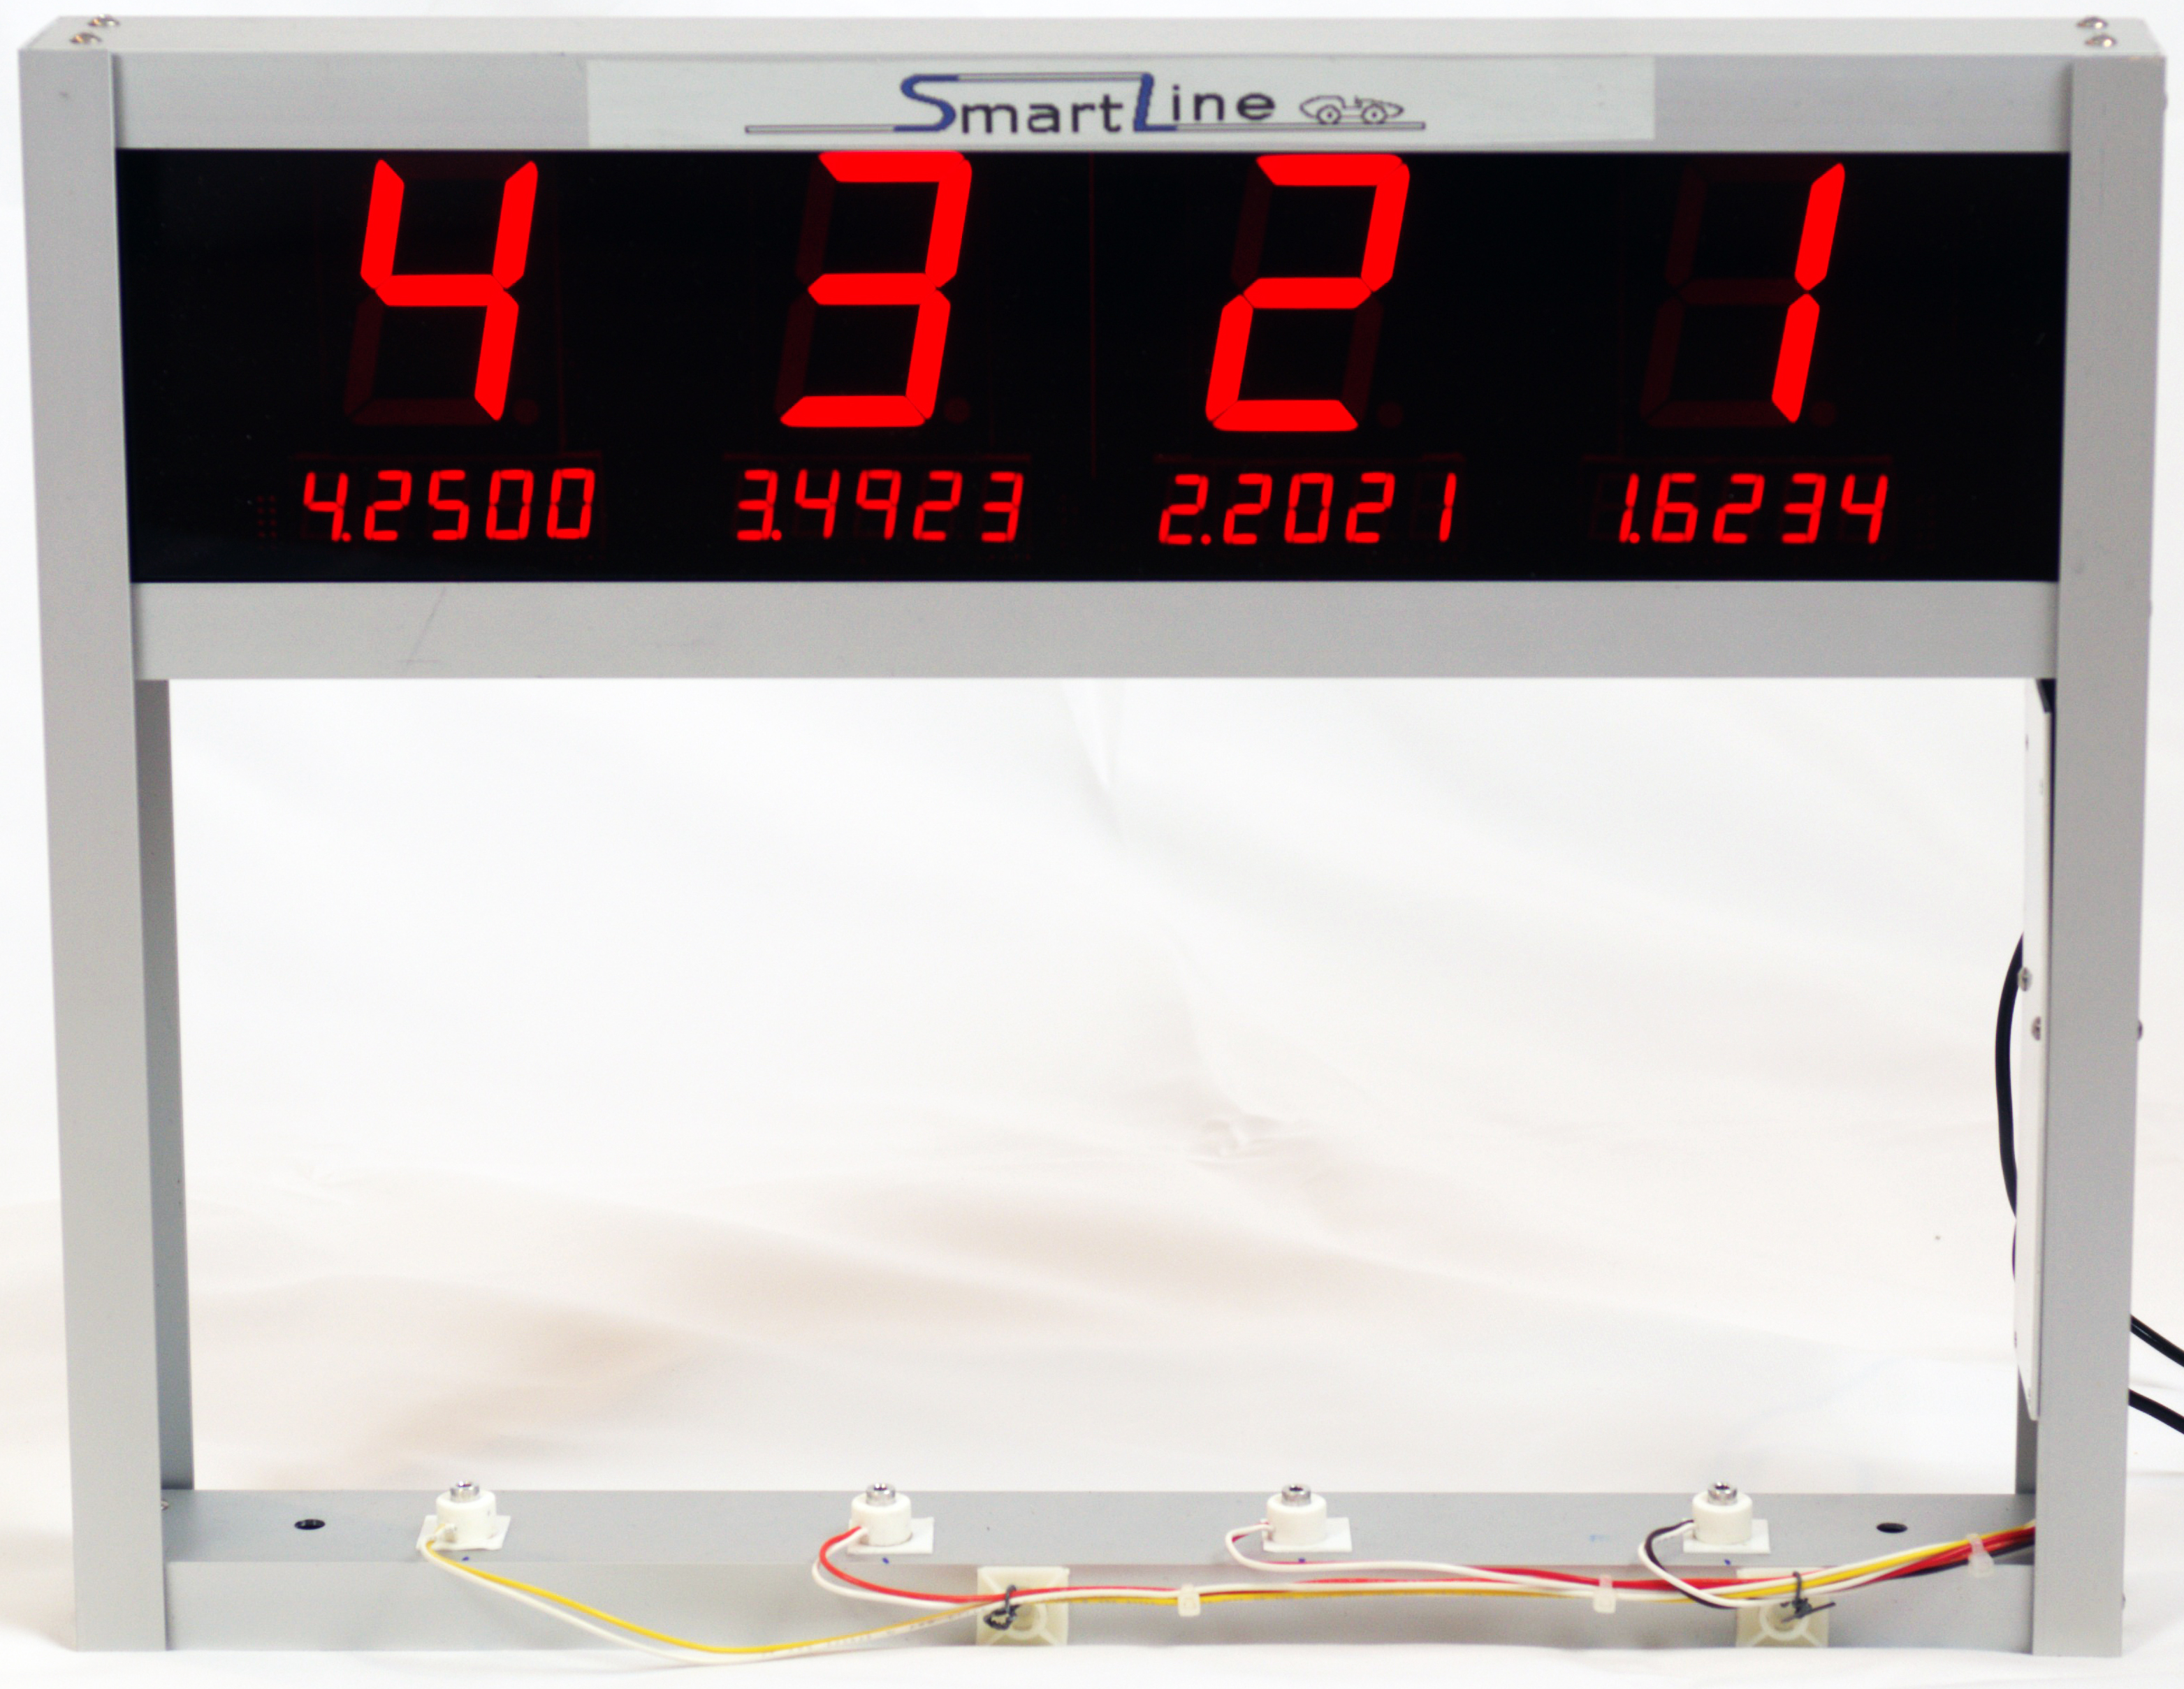
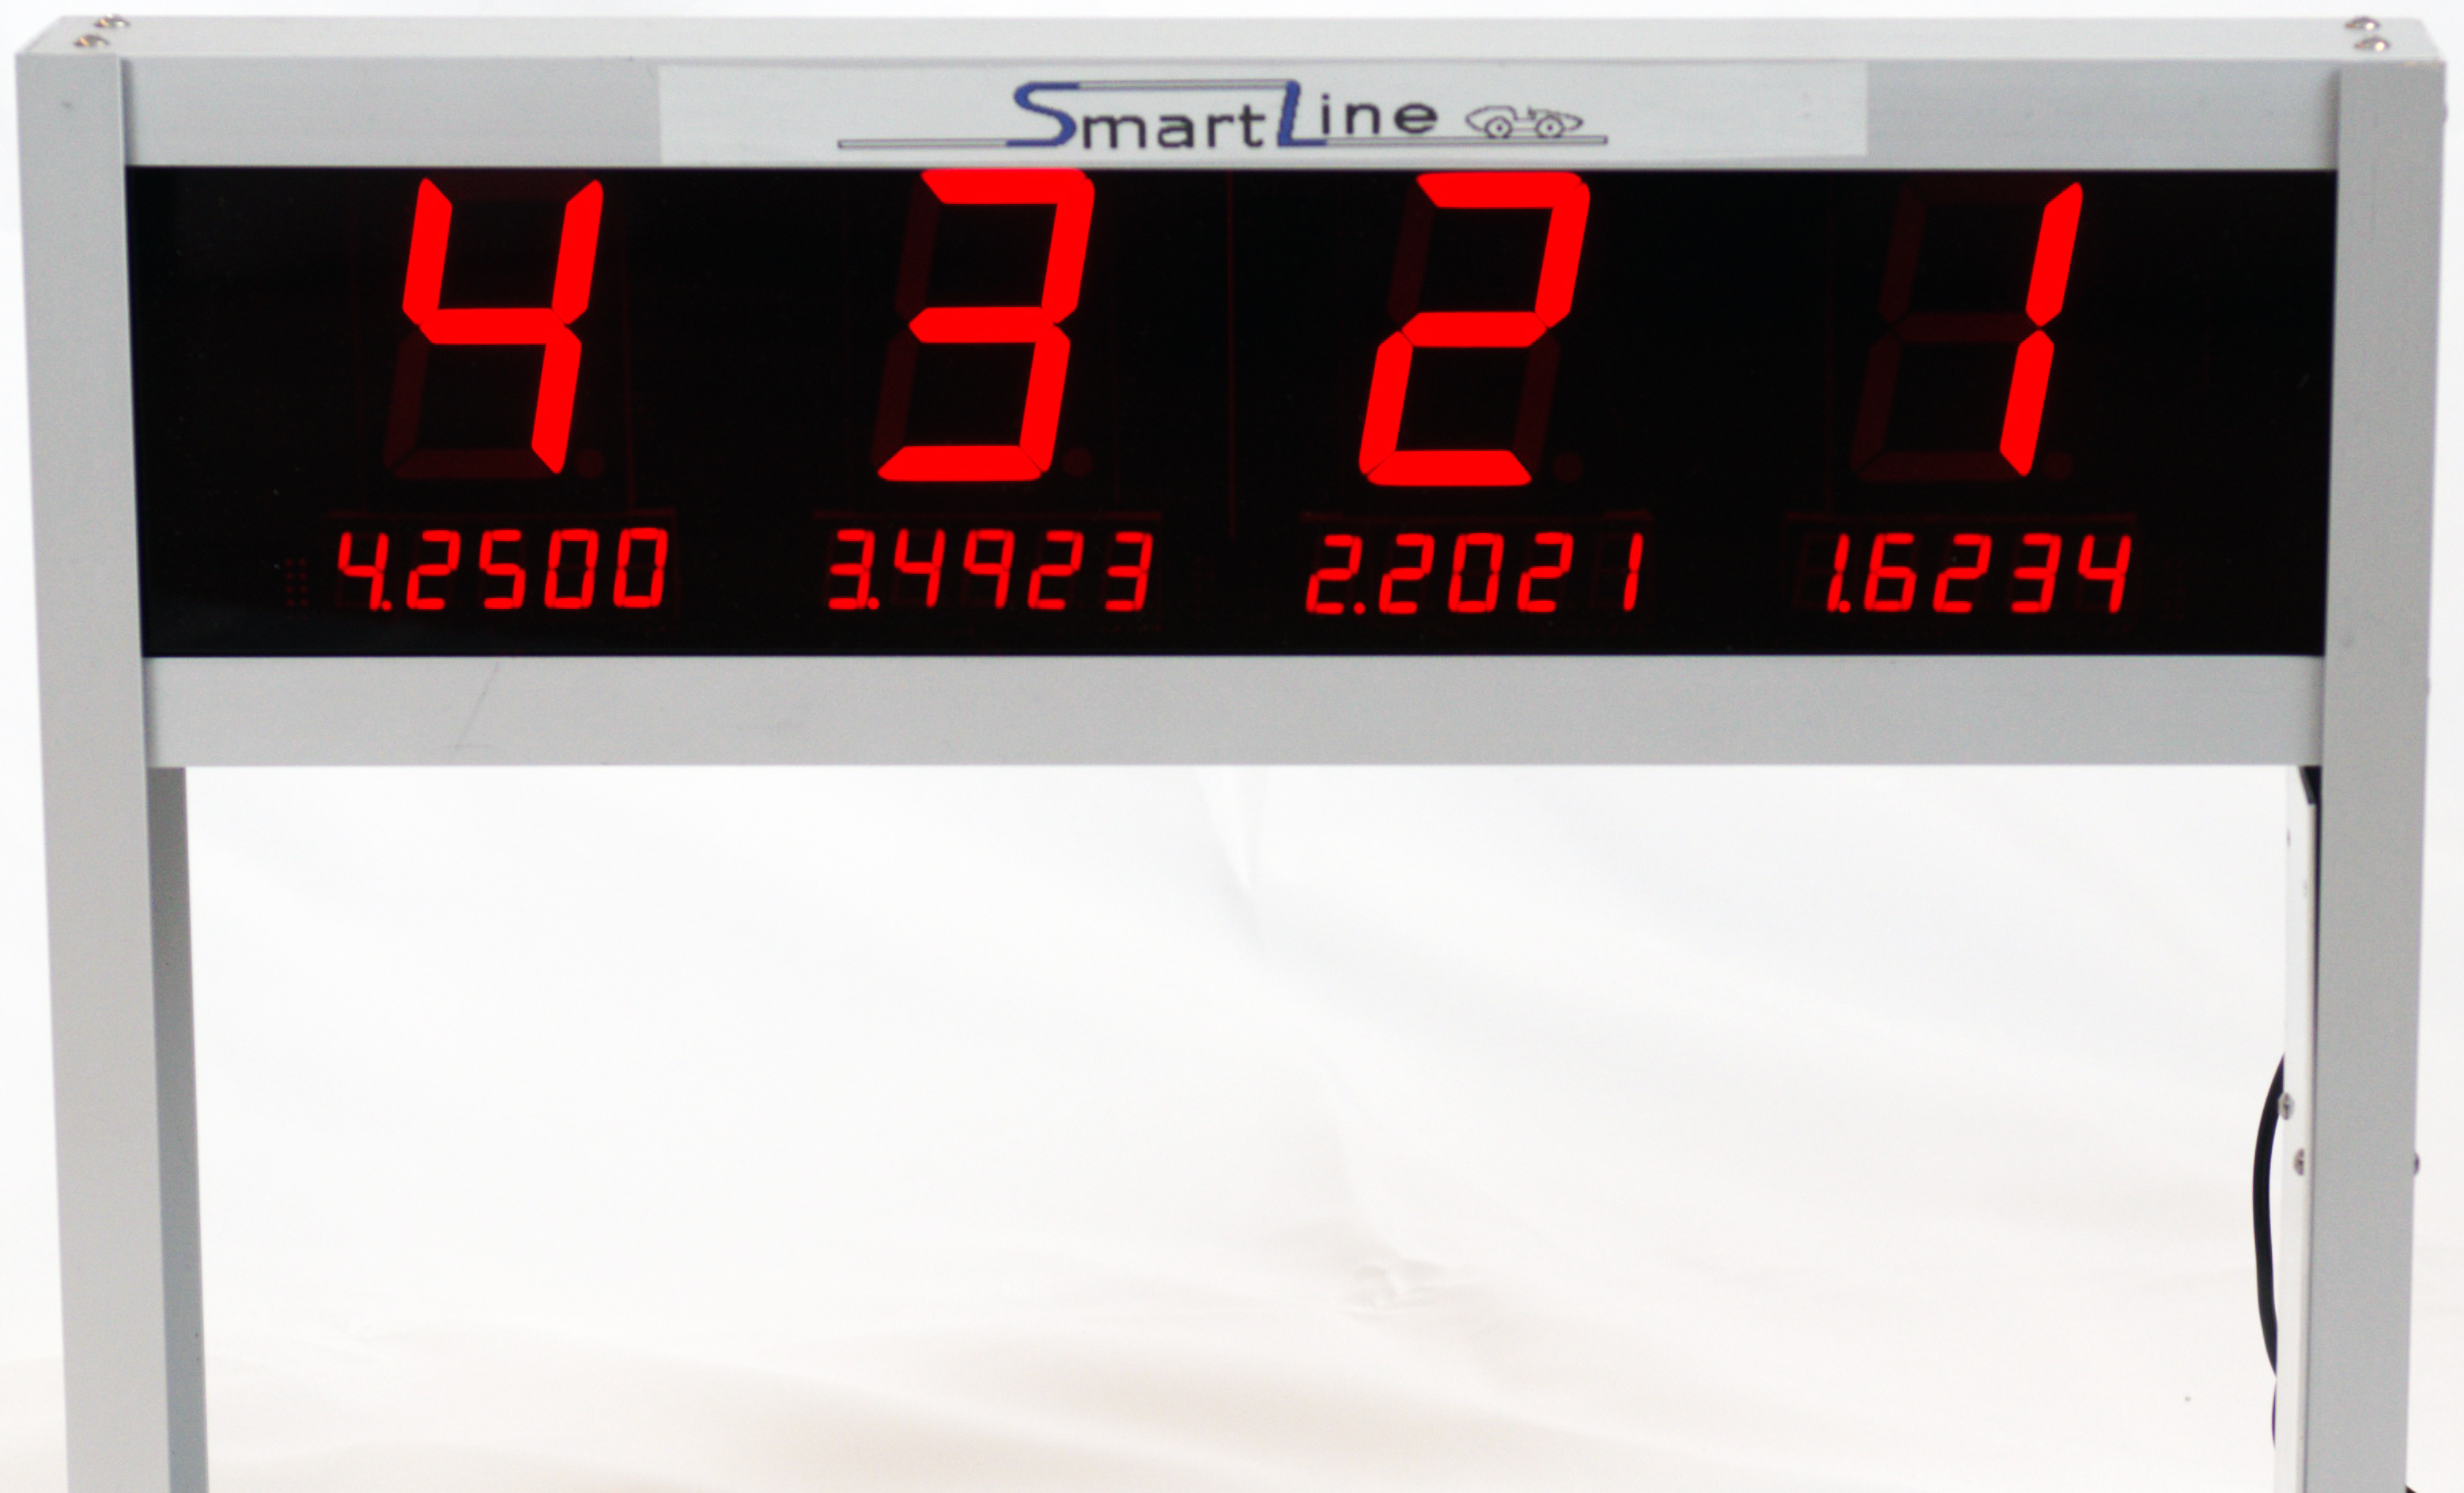
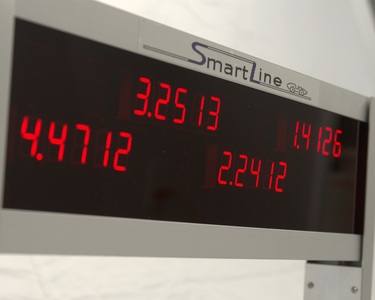
How big are the display numbers?
Time/Placement display heights:
The placement display numbers are 2.25 inches. They are very bright and readable across a large room.
The time display is .56 inches and is located on BOTH sides under the placement display.
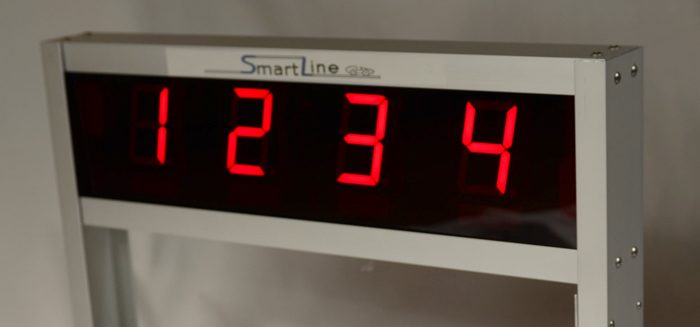
Alternating Time/Placement display heights:
Our new design has an alternating Time/Place display that is .8 inches high and includes an extra decimal place showing 1.2345.
The sophisticated electronics of our timer can produce accurate results to this resolution.
Can I add lanes later?
No. The timer is made to fit your track.
If you intend to purchase an additional lane in the near future,
then purchase a timer with the additional lane.
You can use a spacer for the missing lane and set the timer to the number of lanes you wish to use.
You would need only a piece of track about a foot long to use as a dummy lane for mounting purposes.
Inquire with the track manufacturer about this.
If you have a timer for a smaller track and want to upgrade,
we suggest that you consider selling the timer you have and purchasing a new one.
We could add parts and make new horizontal pieces but it is not practical.
Can I add items such as the retrofit sensors for a Space Derby® later?
Yes - You may add any of the additional items at a later date very easily.
For example:
You may add the SmartLine Photo Finish Device and software at any time.
It is a separate item so you can add it after some extra fund raising.
You need at least a 4 lane SmartLine Pinewood Derby® timer to purchase a Space Derby® sensor retrofit kit.
Use the Pinewood timer and mount it on the Space Derby® frame that you have built with the plans
provided on the Space Derby® Track page or the BestTrack® Space Track.
Please note that you do need the Complete Space Derby® Timer if you do not already have a
SmartLine Timer.
We can not support the use of any other timers with our Space Derby® Sensors.
Please contact us for details.
Installation
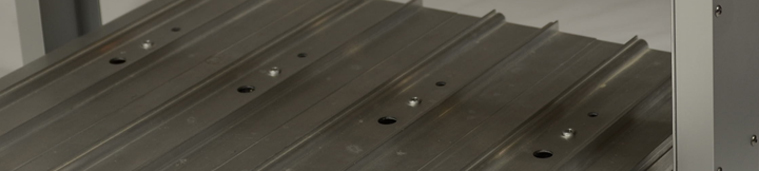
How do I install the SmartLine Timer II on a custom wooden track?
A custom track needs to holes in the track for the sensors and if it doesn't you need to drill 1/4" holes. Please refer
to our Installation Manual for instructions on measuring and drilling holes in your track. You can find it on our "Manuals" page.
We can help you determine how the sensors should be mounted under your track depending on the style of track you have.
There are 2 methods of mounting your timer and sensors to the track for best performance.
The
first option for mounting is to have the sensors under the mounting bar.
The
second option for mounting is to have the sensors above the mounting bar.
They may need to be placed on foam pads to press them up into the hole in the track.
The manuals page is a great resource for installing your timer.
Visit the manuals page for information in the Installation and Quickstart Manuals.
How do I install the timer on a BestTrack® Track?
The installation of the timer to a BestTrack® track is simple and toolless. We use wingnuts on the bolts that are slid into
the channel of the track. This makes it easy!
Make sure the sensors are positioned to the center row of holes and that they are facing straight up.
You slide the head of the hex screw into the side channel and use the wing nuts to secure it into place. Click to see the
BestTrack® Installation image.
Purchasing and Shipping
How easy is it to purchase a SmartLine Finish Line Timer?
Make selections on Product page.
- Browse through the products on the Products page.
- Press "See Details" or "Select Options" to go to the Items Description Page.
- Use the drop-down lists to tell us:
- the number of lanes you need
- what type of display you would like
- what type of track you have
- if you want the Serial or embedded USB version of the timer.
- The price will change depending on the selections you have made.
- When you have chosen the item you want select the "Add to Cart" button.
- From your shopping cart use the "Continue Shopping" button to select additional items such as a case.
Checkout with PayPal
- You may pay with a credit card or echeck.
- You do not need a PayPal account.
- The items in your shopping cart can be removed if you change your mind.
- For new buyers, signing up for a PayPal account is optional. This means you can complete payments as a guest first, and then decide whether to save your information for future purchases.
Complete the Checkout with PayPal
- All information you enter is through the secure PayPal system.
- Enter the following:
- Shipping information -- Enter your name and shipping address.
- Billing information -- Enter your credit card information, email address and phone number.
- Optional: Message to Seller
- Review of payment information -- Review what you've entered to make sure it's correct.
- Optional: Save customer information with PayPal -- To shop more quickly and easily in the future, save the information that you've entered with PayPal. To create a PayPal account, all you need to do is choose a password and answer a few security questions.
What is the shipping price?
Shipping and Handling:
Shipping prices will be shown in PayPal Checkout.
Prices are calculated depending on order amount and your location.
We reserve the right to invoice for additional shipping if needed, however, excess shipping charges may be refunded.
All timers are sent via UPS. Small packages (ie. cables, power supplies or accessories) are sent USPS Priority Mail.
Price structure:
$18.00 USPS Small box shipments.
$25.00-$55.00 UPS Ground rates based on location.
We highly discourage expedited shipping however if it is required,
we will invoice you for the extra shipping amount before sending the item. You may also select
"Air Service" if given the option.
"Air Service" is UPS 3 Day Select (includes Hawaii and Alaska) ..........$169.00
USPS Priority Mail for Puerto Rico ........................................$120.00
Military mailing is supported. Mail must be addressed to someone specific.
An invoice for shipping/handling will be sent to your email.
Some special cases may apply to shipping. We may contact you for best shipping options.
Please contact us on SmartLine's Facebook
or through email if you have more questions or concerns.
How long will it take to get the timer?
Typically, orders take 2 weeks to fabricate and ship out.
We currently have standard BestTrack® and Microwizard(Piantedosi) Aluminum track sizes made.
We can send these timers out in less than 1 week.
Shipping times may take more than 2 weeks in peak season.
Consider the additional time of shipping from NY to your location. We can tell you how long that takes after we receive your order.
We try to ship it ahead of your race so you have time to test the timer.
How is the product shipped?
We ship via UPS Ground for all timers unless you specify otherwise. Refer to the shipping and handling chart for details. You will receive a tracking email when your item is shipped and when it is delivered. We ship via USPS Priority Mail for smaller items.
Returns
Repair or replace? Should I return the timer for repair?
We will evaluate your timer and repair it for a fraction of the price of a new timer. In most cases, our timers can be repaired.
It is best to send it in to find out if it can be repaired. First, take a look at the
Repair Policy
This product is guaranteed for 3 years. We will repair it for free
if you have proof of purchase that is within the 3 year warranty limitation.
The service does not include misuse and it is limited to the timer electronics.
How and where do I return the timer for repair?
View our
Repair Policy then proceed to request a repair.
You may also contact us before returning the unit for service by email or
call us at (845) 229-5189. We will need your email in any case to contact you with an RMA # so go to
Request a repair
How do I return the timer if I'm not satisfied?
We hope that everyone is happy with our products. Please review our repair, return and privacy policies page.
Security and Privacy
How secure is my information?
The security and privacy of our customers is very important to us.
Click to view our
Privacy Policy only.
You may also review all our repair, return and privacy policies.


 © 2004-2022 eTekGadget · All rights reserved ·